Configure Custom Fields Using Lightning Flow
Summary
Surface contains multiple managed Lightning Flows that are provided as templates (example: the SAP Sales Document Flow). You can't edit any of these managed flows, but you can use the provided templates to create your own custom flows. For example, you can use the SAP Sales Document Details flow template as your starting point, add custom fields that display your desired customer details, and then save your custom flow using a different name (example: SAP Sales Document Details Custom).
-0172fbf58c0f8d63bfc428761f34e249.png)
After you configure SAP Component Custom Field Groups and SAP Component Custom Field Definitions using Custom Metadata Types, you need to create and configure a new customized flow that displays your custom fields.
- The process described below provides an example of how to configure a flow to display a group of custom fields for Surface's SAP Sales Document Details component.
- You must repeat this process for each flow that displays for each Surface component (example: Surface's Sales Document Detail component) that references the SAP Component Custom Field Group that you configure.
Configure a Custom SAP Sales Document Detail Flow
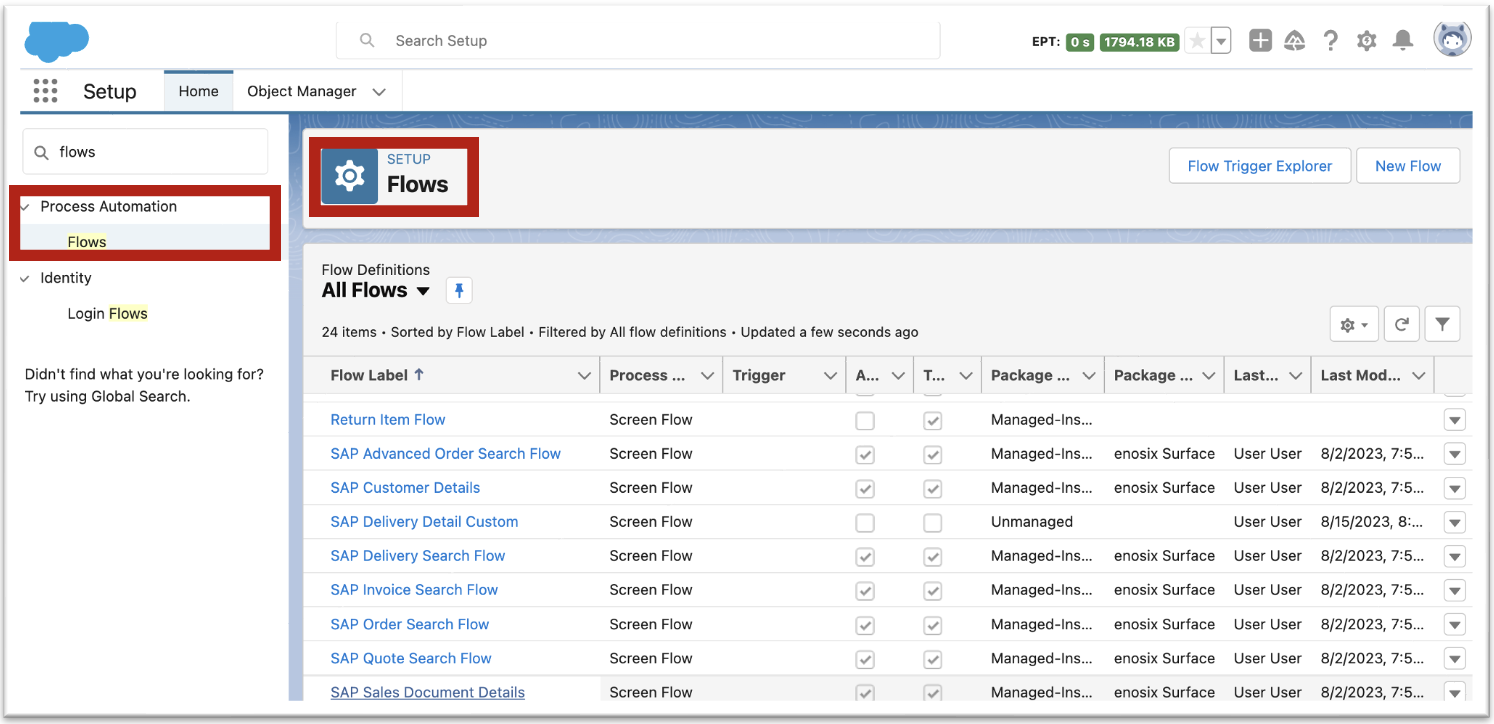
- Go to Setup.
- Use the Setup Quick Find box to search for "Flows", then click the Flows link (under Process Automation). The Setup Flows page displays.
Open Flow Builder
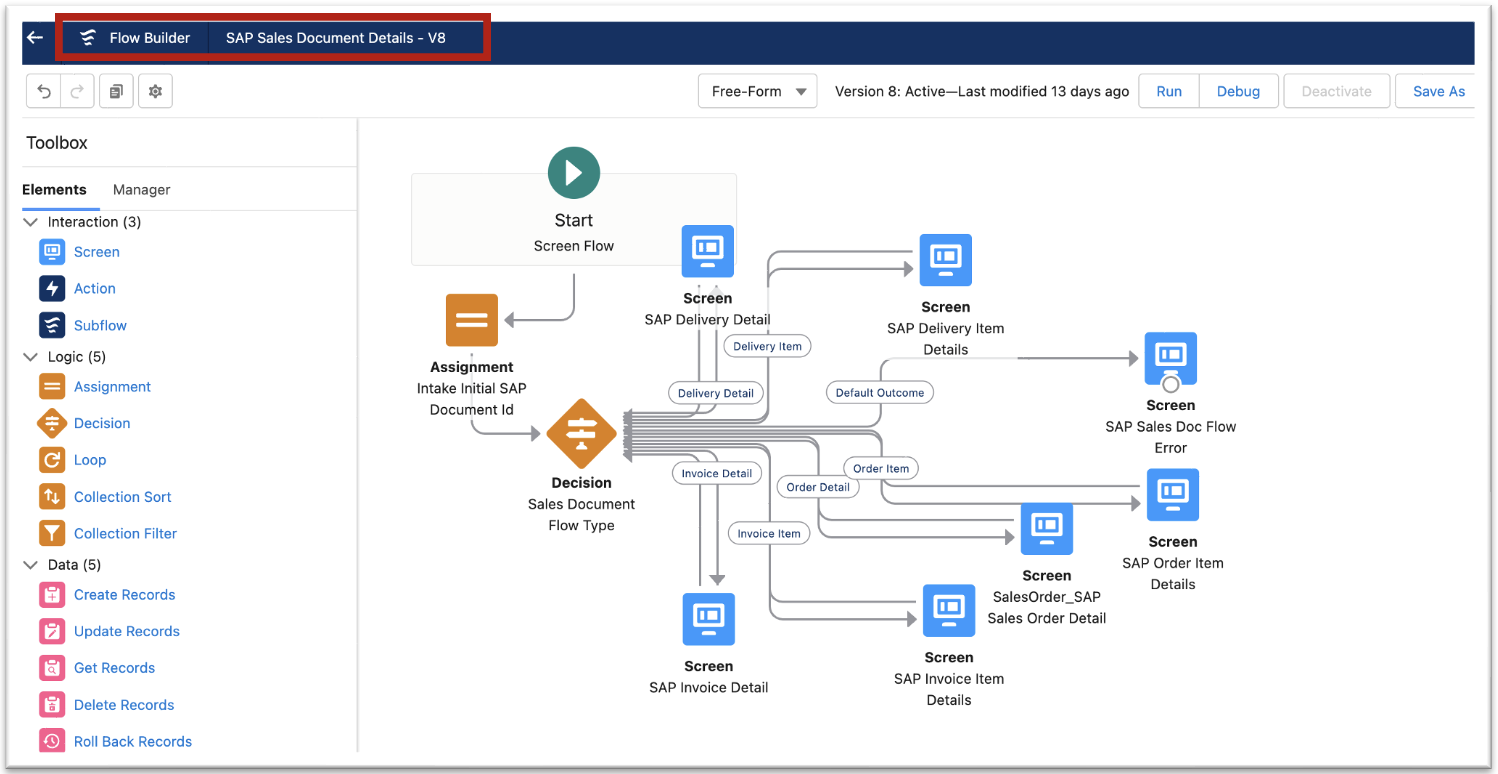
- Click on the SAP Sales Document Details flow label link. The Flow Builder displays.
Select a Screen Element
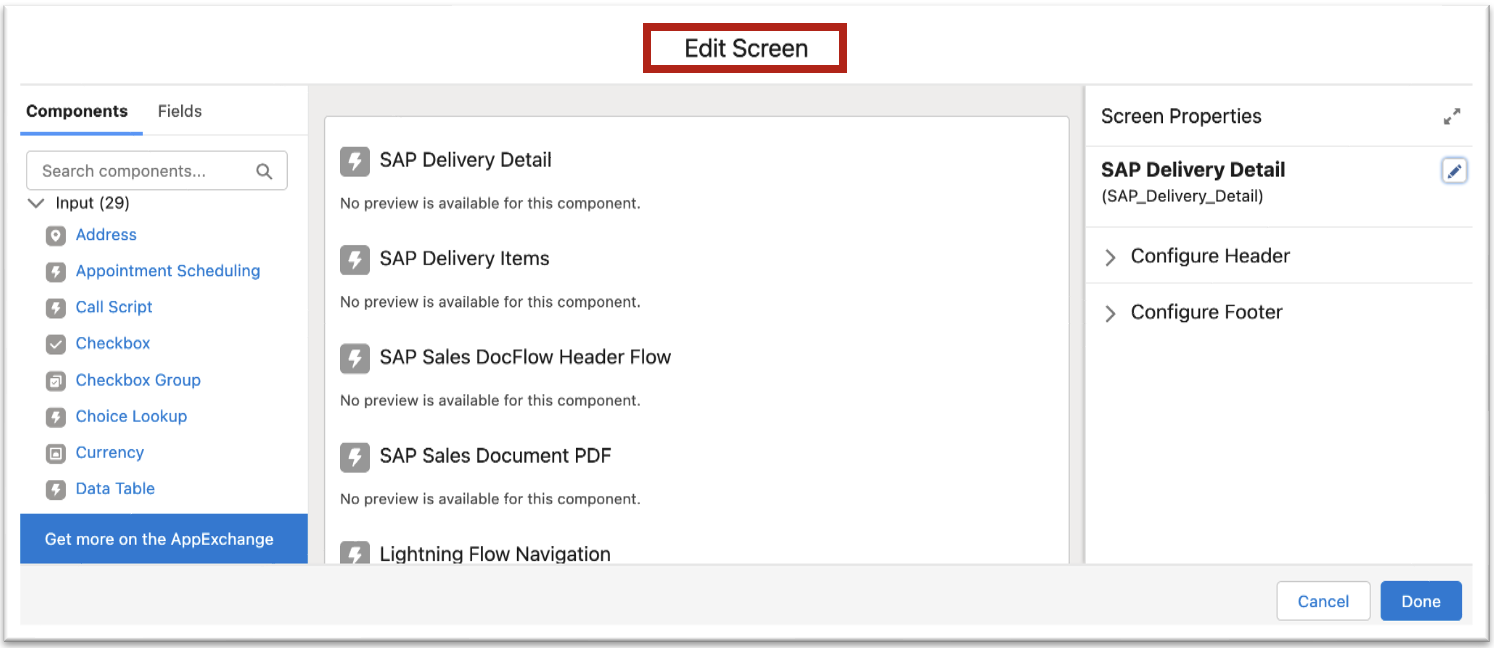
- Double click on the screen element that you want to customize (example: SAP Delivery Detail).
Modify Component Properties
- The Edit Screen modal displays. Click on the component that you want to configure (example: SAP Delivery Detail).
- Fields are listed on the right-hand side of the Edit Screen modal.
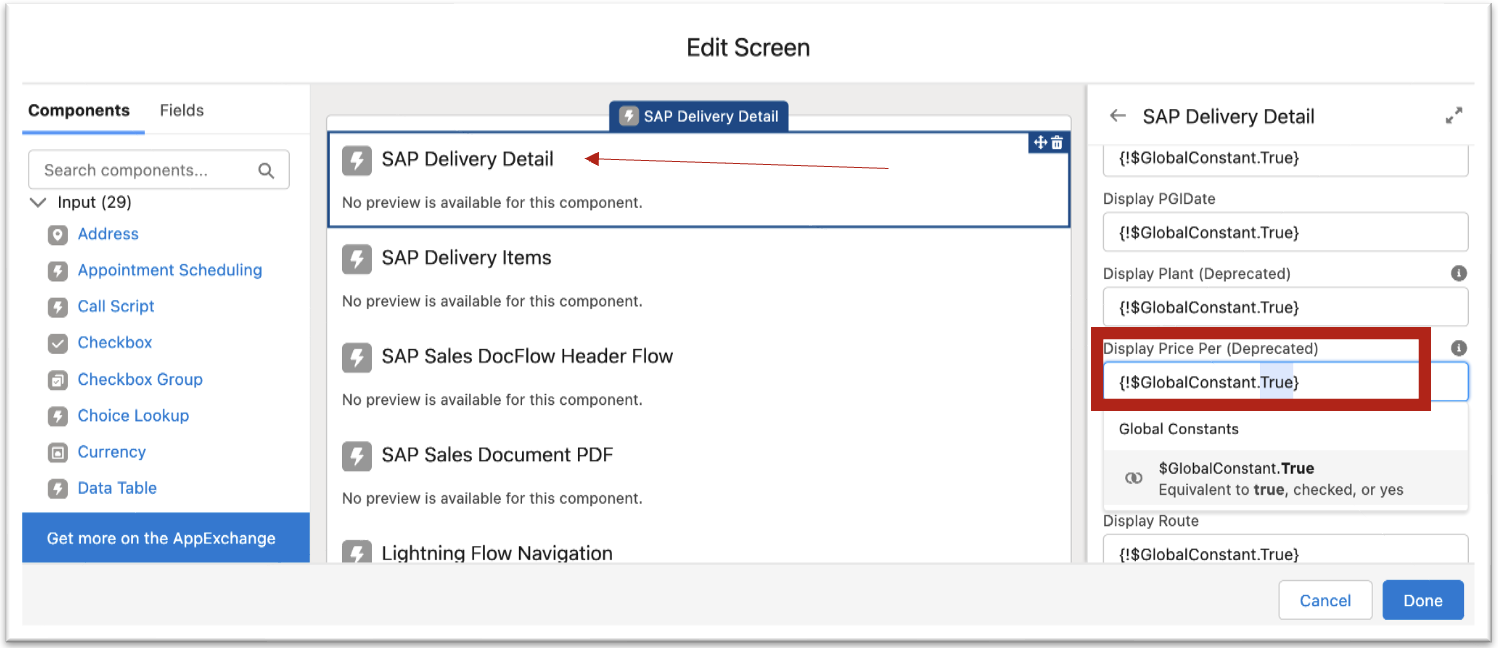
- Fields that have GlobalConstant.True = will be displayed in the component.
- Fields that have GlobalConstant.False = will NOT be displayed in the component.
- Components that allow you to change the title or define custom field labels have free text fields that allow you to manually enter a value.
- Follow these steps to change a field's value:
- Click in a field.
- Remove the current value.
- Select the new value (GlobalConstant.True or GlobalConstant.False).
-2caa944f9ab5b3351acd57caa15dc8ec.png)
Select the Custom Field Preset
- In the Custom Field Presets field, enter the name of the preset you want to connect the field to. The preset must exist in the SAP Component Custom Field Group (example: "CD_Fields").
- Click the Done button after you've made all of your desired changes to all components for a screen element.
- Repeat the preceding steps for each screen element that you want to customize on the various document / item detail pages.
Save and Activate Your Custom Flow
After you've made all of your desired customizations, you must save and activate your custom flow. Follow these steps:
Save Your Flow
- Click the Save As button in Flow Builder.
- In the Save As modal, enter a name for your custom flow in the Flow Label field (example: SAP Delivery Detail Custom). The Flow API Name field will use your Flow Label text to auto-generate a unique name that will be used by the Salesforce API.
- You can enter a brief description of your custom flow in the Description field.
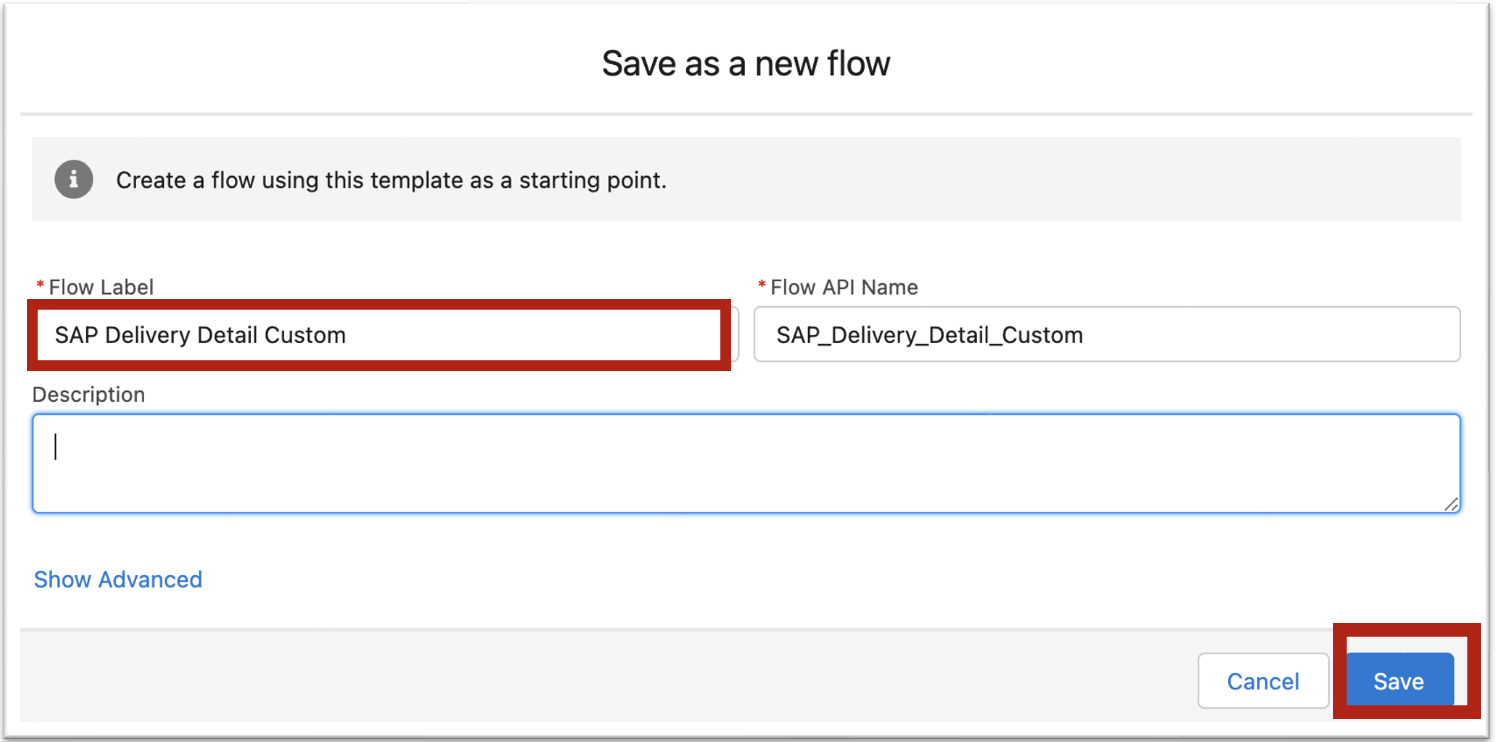
- Click the Save button.
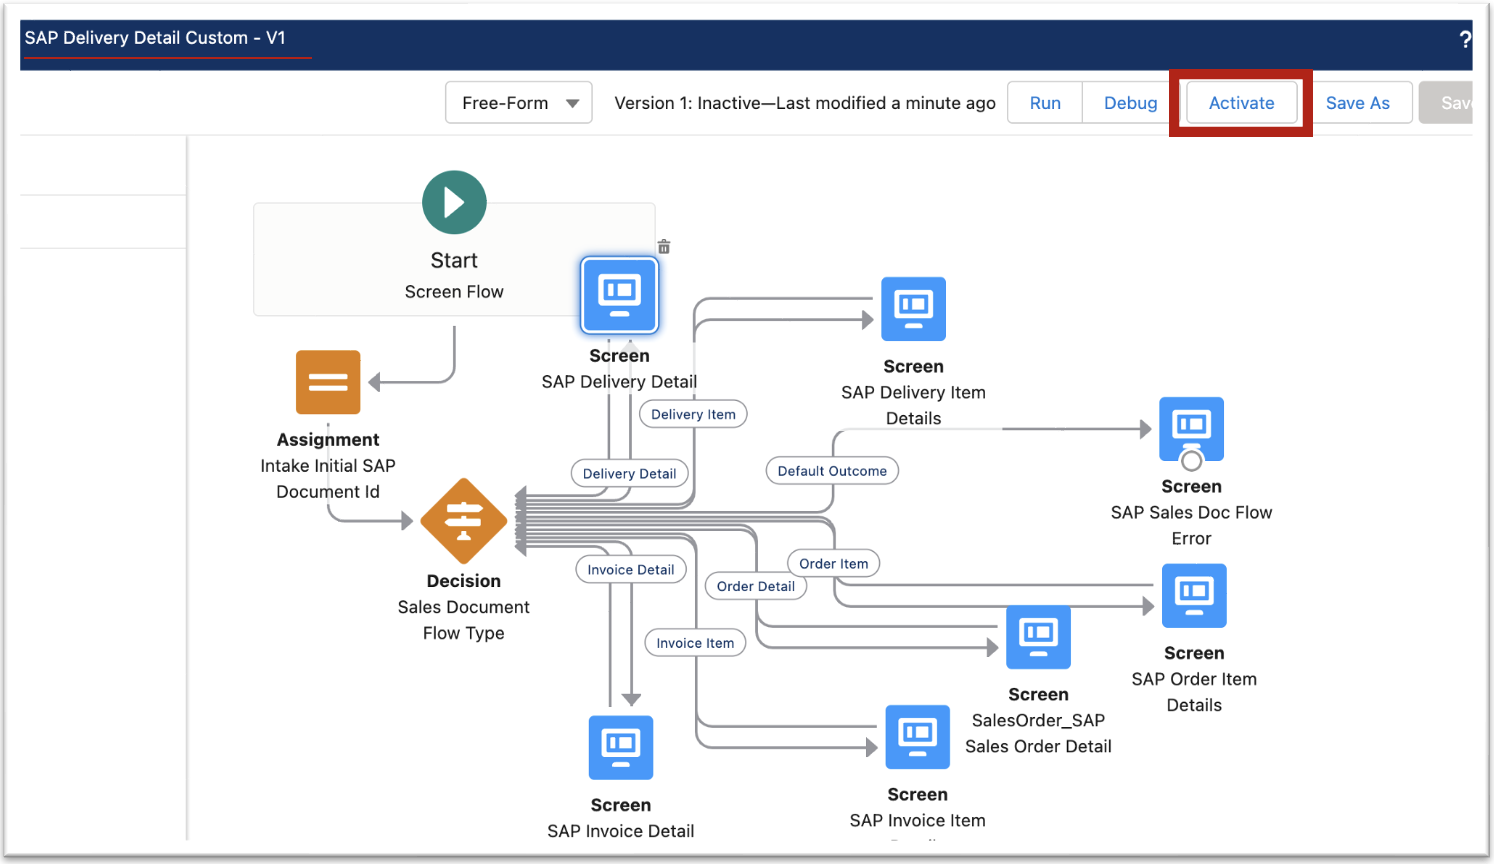
Activate Your Flow
- Your flow is created and is set to "Inactive" status. Click the Activate button in Flow Builder.
- Your custom flow is active.
Configure Your Lightning Flow Component to use Your Custom Flow Override
After you create a new flow, you need to Configure Your Lightning Flow Component to use Your Custom Flow Override.
Add an Action Button to Launch Your Lightning Flow
After you create a custom flow, you may want to add an Action button that allows you to easily launch your custom flow. Salesforce provides this functionality through their Buttons, Links, and Actions.