Packages
Overview
A Package is a snapshot of selected APIs at the particular point in time when it was created. After a Package is created, it can’t be modified. If edits are made to the APIs in the Project, a new Package must be created before publishing it. These edits might include changes to the list of APIs, as well as changes made to individual RIOs or RFCs in SAP that require a new schema to be published.
Creating a Package allows you to publish those APIs to an App, as well as to easily move a set of API calls from one App to another (for example: from development to test to production). You can also roll back an App to an earlier Package, if needed.
Make a Package
To make a Package, follow these steps:
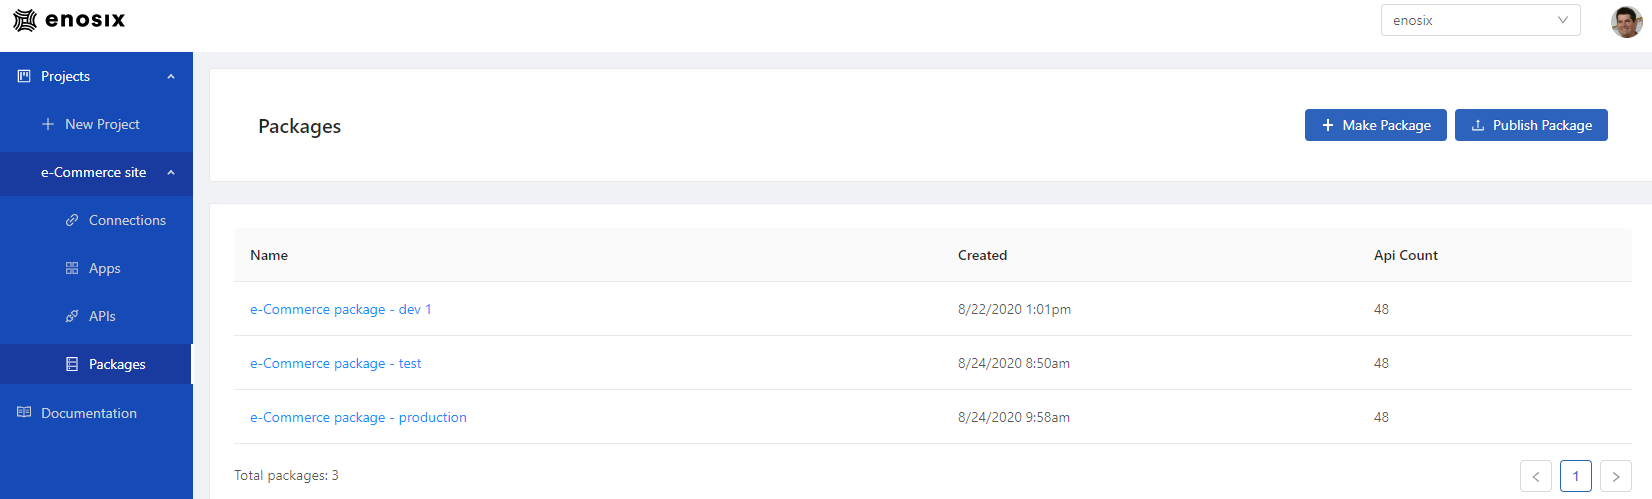
- Click the name of the Project in which you want to make a Package, then click the Packages sub-heading in the left navigation pane. The Packages screen displays a list of the existing Packages.
- Click Make Package (in the upper right of the screen) to display the Make Package dialog.
- Enter a unique name for the new Package in the Name field. This step is required.
- You can add a short description of the Package in the Description field. This step is optional.
- Click Make Package to create the new Package.
Display a Package’s Details
To display a Package’s details, follow these steps:
- Click the name of the Project in which you want to see Package details, then click the Packages sub-heading in the left navigation pane. The Packages screen displays a list of the existing Packages.
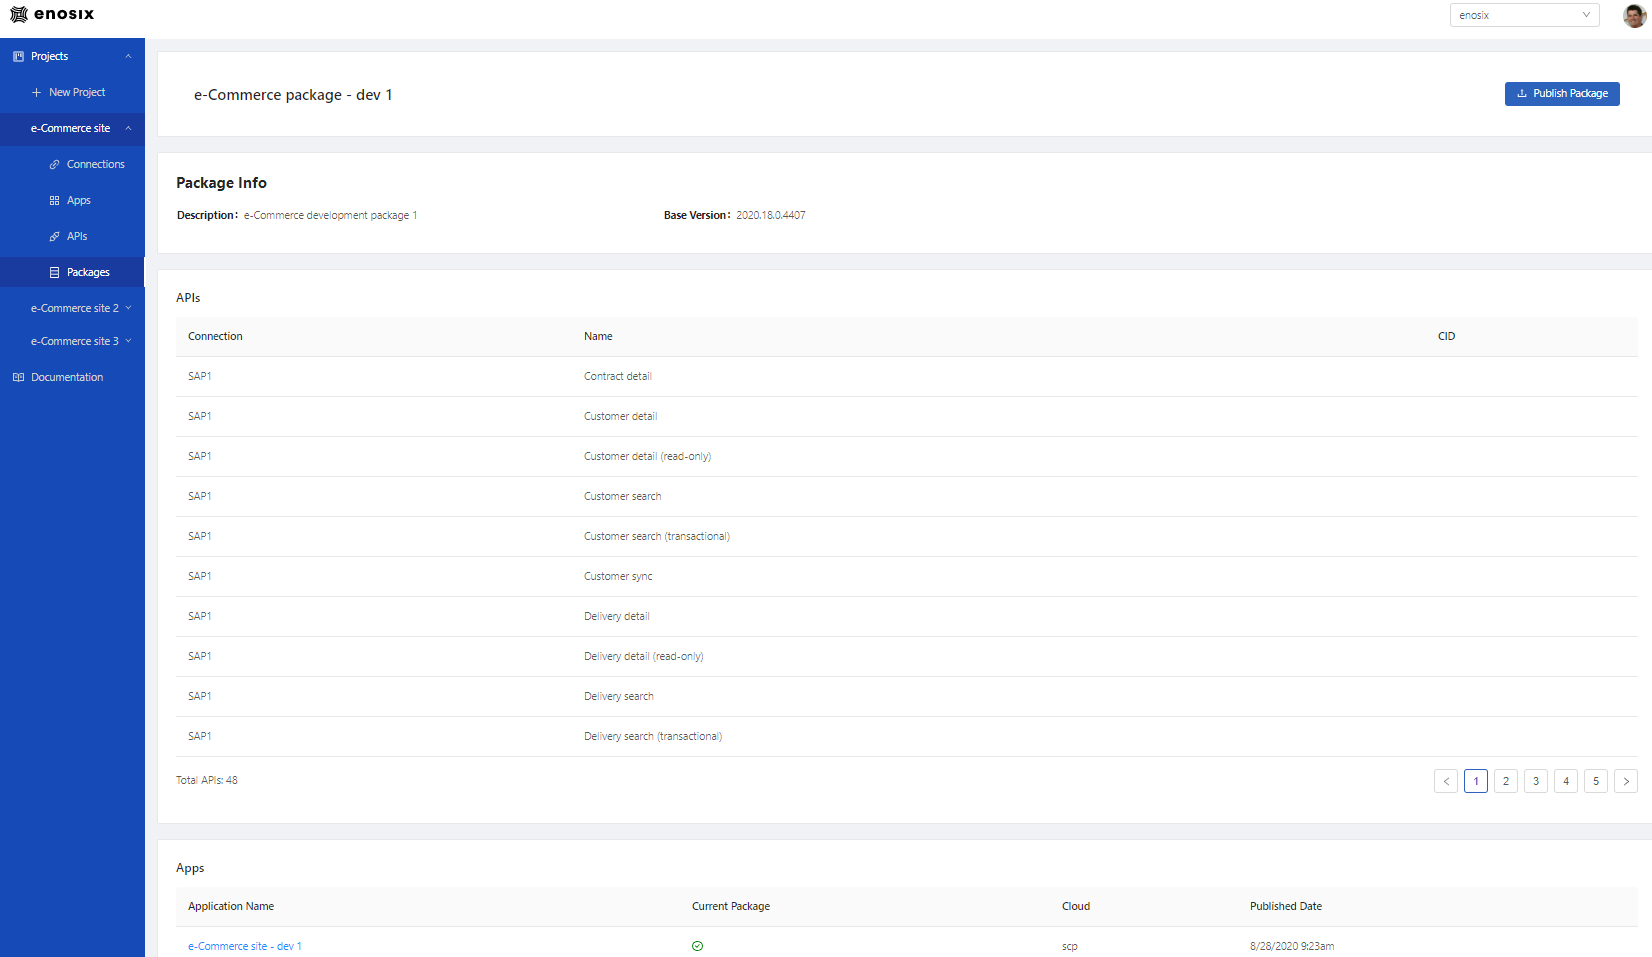
- Click the name of the Package for which you want to see details. The Package Info screen displays details for that Package, including: Package name, Description, Base Version, a list of APIs, and a list of Apps. In the list of Apps, a green check mark in the Current Package column indicates that the Package is currently published to the App.
Publish a Package
You can publish a Package from multiple places within the enosix Connect console: the Apps screen, the Packages screen, the Package Info screen, and the Project Info screen.
When you’re on the Package Info screen and you click Publish Package, you don’t need to select a Package to publish, so go directly to the steps listed under Select App. When you’re on the Apps, Packages, or Project Info screen, follow these steps to publish a Package:
- Click Publish Package (in the upper right of the screen) to display the Publish Package wizard.
- To publish a new Package, click New and follow the steps listed under Publish a New Package. To publish an existing Package, click Existing and follow the steps listed under Select an Existing Package.
Publish a New Package
- Enter a unique name for the new Package in the Name field. This step is required.
- You can add a short description of the Package in the Description field. This step is optional.
- Click Create Package and follow the steps listed under Select App.
Select an Existing Package
- Select an existing Package from the Package Name drop-down list. After you select a Package, the Package Description (Package Name, Created date, Included APIs) is listed. Click Confirm Package Selection and follow the steps listed under Select App.
Select App
- Select an App from the App drop-down list, then click Confirm App Selection.
- The Package Details (Package Name, Created date, Included APIs) are listed along with the App name. Click Confirm and Publish.
Updating the Connect App
When there is an update available, a banner will display when viewing the app in the Connect console. See screenshot below.

To update your Connect app, create and publish a new Package.
-
Create a new package:
- Follow the steps for creating a new Package as outlined in the Packages documentation.
-
Publish the Package:
- Follow the steps to Publish a Package by selecting the package created earlier.
-
Verify the Update:
- After publishing, navigate to the App Info screen of the updated App.
- Ensure the selected Package is listed as the current Package and verify the deployed APIs.
Q&A: Packages
Why is the Publish Package button unavailable (gray)?
The Publish Package button is unavailable (gray) when no Apps have been deployed for the current Project.
Why is my App not listed in the App drop-down list for the Publish Package wizard?
Only Apps that have an Active status are listed in the App drop-down list for the Publish Package wizard. To view a list of existing Apps, click the Project name in the enosix Connect console’s left navigation pane. Then check the Status column for the App’s current status.