Projects
Overview
Each Project represents an API endpoint that supports one or more front-end applications. Projects bundle APIs into groups that align with specific use cases. For example, you can create a Project for your lead-to-cash workflow.
You use the Projects component of enosix Connect to:
- Create a Project
- Add Connections to back-end SAP systems
- Bundle Apps within a Project
- Add APIs to a Project
- Create a Package to save a snapshot of the current APIs
- Publish a Package to create an App (an API endpoint running in the cloud)
enosix Connect provides step-by-step wizards to simplify each phase of this process.
Project Facts
- Each Project within an Account must have a unique name.
- Each Project typically has multiple Apps representing the different deployment environments (for example: development, test, production) that exist for it.
- A Package is a snapshot of the APIs in a Project at a specific point in time.
Operations You Can Perform on a Project
- Edit a Project
- View the project information for each existing Project
- Remove an existing Project
Within each existing Project, you can perform the following actions using the sub-headings (Connections, Apps, etc.) listed in the left navigation pane:
- Add a Connection
- Create an App
- Select APIs
- Create a Package
- Publish a Package
Create a Project
To create a Project, follow these steps:
- In the enosix Connect console’s left navigation pane, click New Project to display the Create New Project dialog.
- Enter a unique name for the new Project in the Name field. This step is required.
- You can add a short description of the Project in the Description field. This step is optional.
- Click Save to create the new Project or click Cancel to discard the new Project.
Display Information About an Existing Project
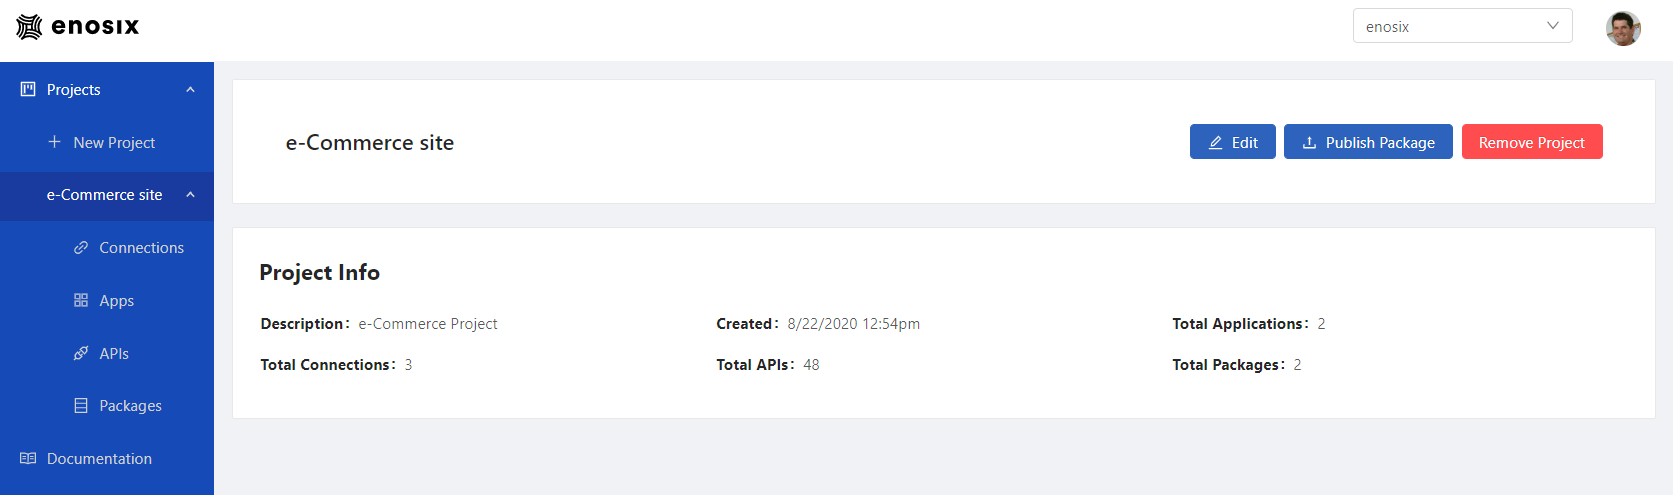
To view an existing Project’s information, click the Project name in the enosix Connect console’s left navigation pane. The Project’s sub-headings display and the Project Info screen opens to display the following information:
- The Project’s name
- Description - a short description for the Project
- Created - the date and time when the Project was created
- Total Apps - the number of Apps in the Project
- Total Connections - the number of Connections in the Project
- Total APIs - the number of APIs currently selected for the Project
- Total Packages - the number of Packages within the Project
View a List of Projects
Your list of Projects is displayed in the enosix Connect console’s left navigation pane.
Edit a Project
To edit an existing Project’s Name and Description fields, follow these steps:
- In the enosix Connect console’s left navigation pane, click the name of the Project that you want to edit. The Project’s sub-headings display beneath the Project name and the Project Info screen displays.
- Click Edit (in the upper right of the screen) to display the Edit Project dialog.
- Modify the Project’s Name and/or Description fields as desired. The Project’s Name must be unique.
- Click Save to save your changes or click Cancel to discard your changes. The Edit Project dialog disappears. The Project Info screen opens and displays the current project information, including any edits that you made.
Assemble a Project
To assemble a Project, you need to add Connections, Apps, and APIs to your Project and then create a Package. To do this, go to the enosix Connect console’s Projects screen and follow these steps:
- Click the name of a Project that already exists to display its Project Info screen.
- Click the Connections sub-heading beneath the selected Project name. To add a Connection to the Project, follow the steps listed under Add a Connection in the Connections section of this documentation.
- Click the Apps sub-heading beneath the selected Project name. To add an App to the Project, follow the steps listed under Add an App in the Apps section of this documentation.
- Click the APIs sub-heading beneath the selected Project name. To add RIOs/RFCs to the Project, follow the steps listed under Add RIOs/RFCs in the APIs section of this documentation.
- Click the Packages sub-heading beneath the selected Project name. To add a Package to the Project, follow the steps listed under Make a Package in the Packages section of this documentation.
Remove a Project
To remove a Project, go to the enosix Connect console’s Projects screen:
- Click the name of the Project that you want to remove. The Project’s Project Info screen displays.
- Click the Remove Project button (in the upper right of the screen) to display the Remove Project dialog. This dialog includes a warning message that asks you to verify whether you want to remove this Project.
- Project names are case sensitive. To remove the Project, enter the exact Project name in the text box. After you enter the Project’s name, the Yes, remove this project button becomes active. Click Yes, remove this project to remove the Project.
Q&A: Projects
Who can perform actions on a Project?
Anybody who has an account can perform actions on a Project.