Install/Upgrade the enosix Add-On
Follow these steps to install/upgrade the enosix Add-On.
- Log in as client 000 in the SAP GUI with SAP_ALL rights. Do not log in as SAP* (SAP System superuser) or DDIC (SAP maintenance user).
- Start transaction SAINT (SAP Add-On Installation Tool).
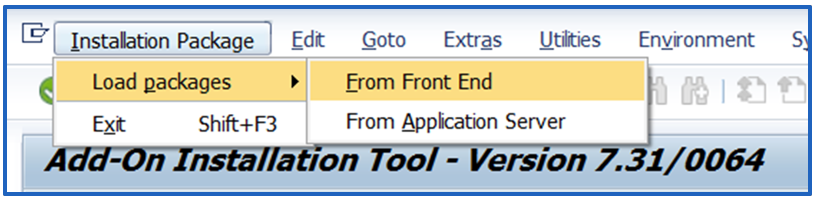
- In the SAP GUI menu, go to Installation Package > Load Packages > From Front End. Look up the provided SAR file(s) on your local computer.
- A popup for decompressing the SAR archive to PAT files appears. Click Decompress.
-b391b1bf757f666bebf1c85b1af1043e.png)
-
After decompression finishes, click Start.
-
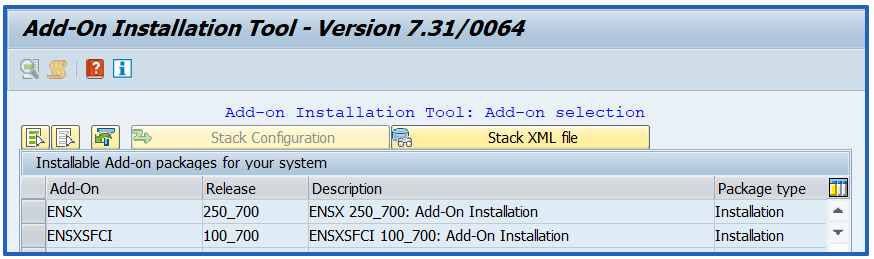
In the list of Installable Add-On packages for your system, locate the ENSX and ENSXSFCI Add-On packages. If they're not listed, navigate back to the starting screen by clicking Load, then Yes, and then Back. NOTE: For installation, the Add-On installation tool must have Package type set to Installation; for upgrade, Package type must be set to Upgrade.
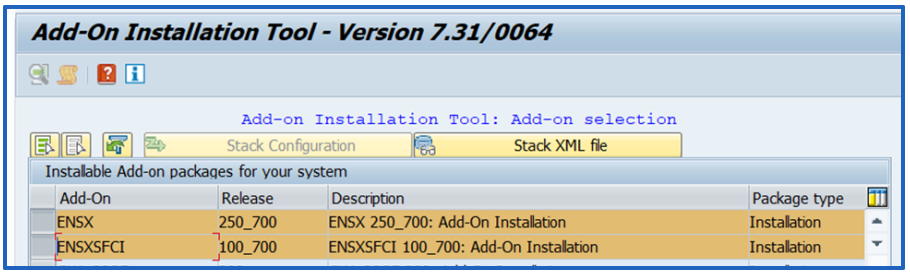
- Select both Add-On rows for ENSX and ENSXSFCI, then click Continue twice.
-
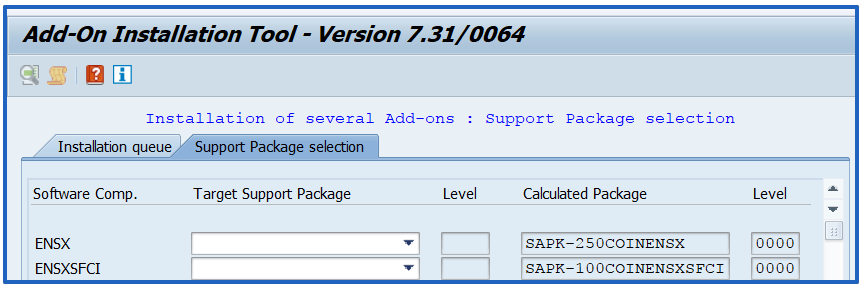
If you try to install the ENSXSFCI Add-On without installing its dependency ENSX, you'll receive a dependency error. If you don't want to install both Add-Ons together, you should first install the ENSX Add-On and then install the ENSXSFCI Add-On.
-
When you’re asked to add Modification Adjustment Transports, click No.

- Click Import (the green check mark button) to start the installation process.
-7fa3bff224b6518c071e6ad4f996cc89.png)
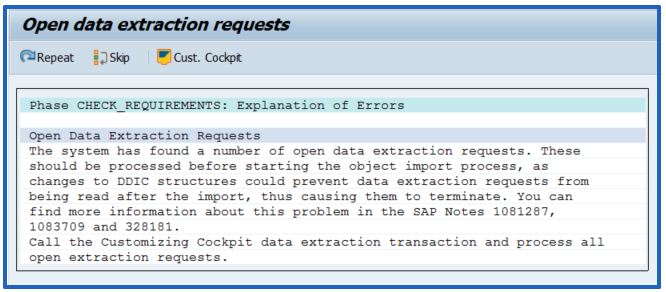
- If you get a warning about Open Data Extraction Requests, click Skip. The Add-On doesn't interfere with Data Extraction. You can follow the instructions to clean up the queues, but it's not a requirement.
- After the process completes, click Finish. You can save the runtime analysis if you want, but it’s needed only if an error occurs.

The enosix Add-on components are now installed on your system!