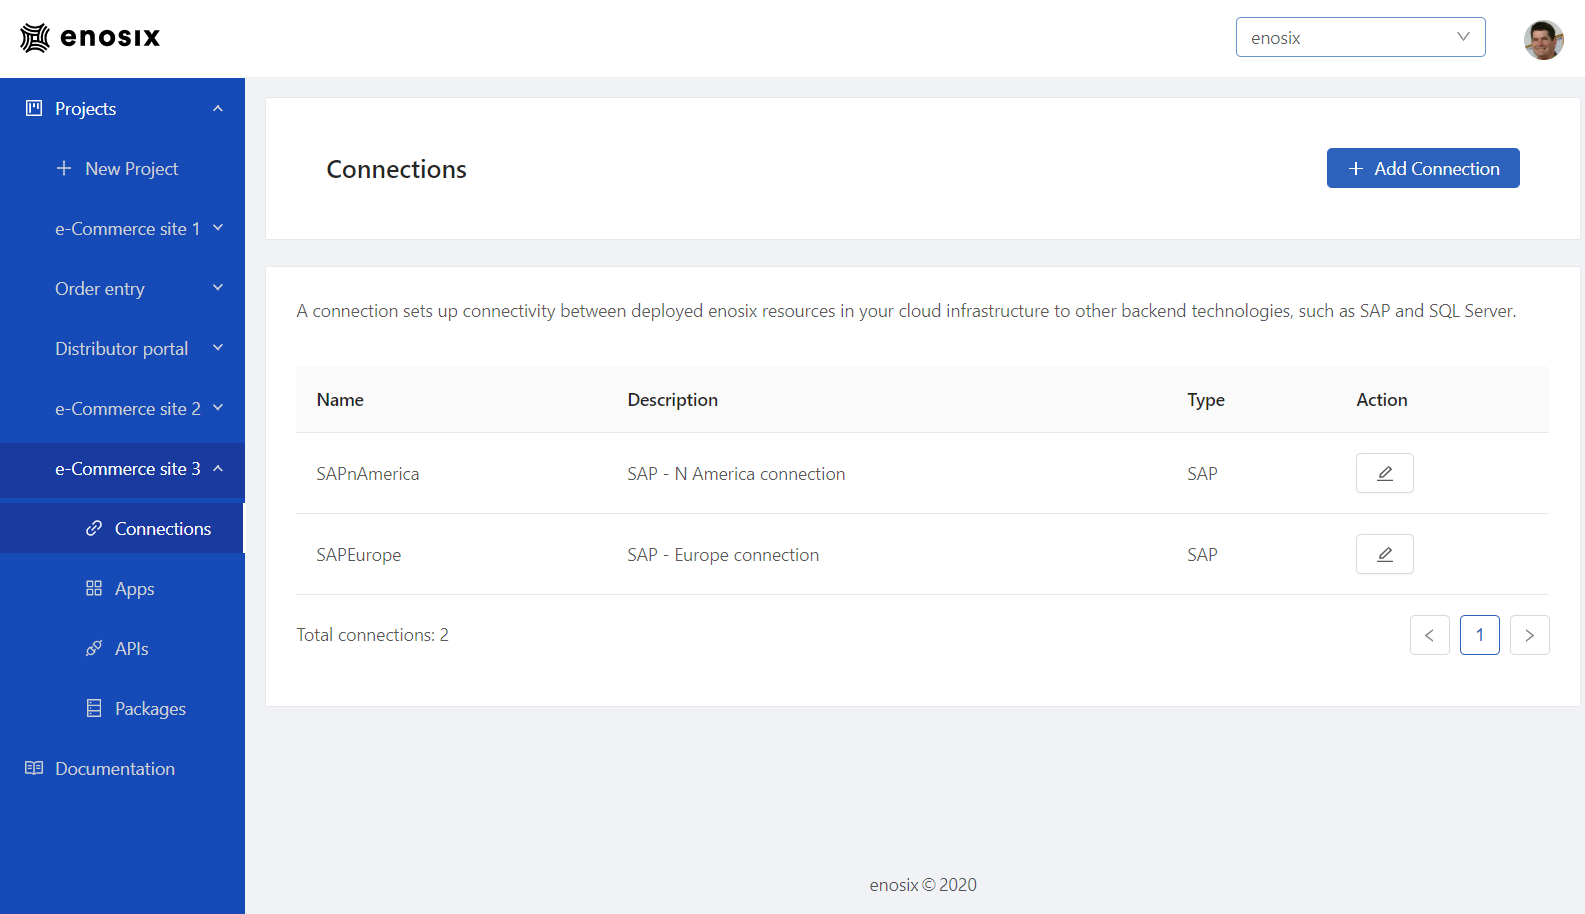
Connections
Overview
A Connection associates deployed endpoints with your back-end SAP systems. You use the Connections component in the enosix Connect console to configure the different back-end systems your Project will need. When you add a Connection, you are simply giving it a name.
Each App within your Project can point that Connection to a different SAP system. In this way, you can easily move your Apps from development to test to production (for example) and have each environment connecting to the corresponding SAP system automatically. In other development environments, this is the equivalent of using an environment variable to support deploying an application in different environments.
The only time you would need multiple Connections within a Project would be to support multiple SAP systems WITHIN THE SAME APP (for example, if you wanted an endpoint to be able to serve APIs from two different SAP systems supporting different geographies).
Add a Connection
To add a Connection, follow these steps:
- On the enosix Connect console’s Connections screen, click Add Connection to display the Add Connection dialog.
- Enter a unique name for the new Connection in the Name field. This step is required. IMPORTANT: Once a Connection name is created, it can’t be modified.
- Enter a short description of the Connection in the Description field. This step is optional.
- Click Save to create the new Connection or click Cancel to discard the new Connection. The Add Connection dialog closes and, if you clicked Save, the newly-created Connection displays on the Connections screen.
Display Information for Existing Connections
On the enosix Connect console’s Connections screen, you can see the following information for each existing Connection:
- Name - a user-defined name for the Connection
- Description - a short description for the Connection
- Type - the database (SAP) with which a Project connects
- Action - a button to edit the Connection’s description

Edit a Connection’s Description
To edit a Connection’s description, follow these steps:
- On the enosix Connect console’s Connections screen, click the pencil icon in the Action column for the Connection you want to edit. The Edit Connection dialog displays.
- Make your desired edits to the Description field.
- Click Save to save your changes or click Cancel to discard your changes. The Connections screen displays and your edits are visible.
Q&A: Connections
Who can perform actions on a Connection?
Anybody who has an account can perform actions on a Connection.
Can I delete a Connection?
Once a Connection is created, it can’t be deleted.