Create a New Link
In order to sync data from SAP to Salesforce you must first create a link.
The following steps will walk you through creating an example Customer Sync.
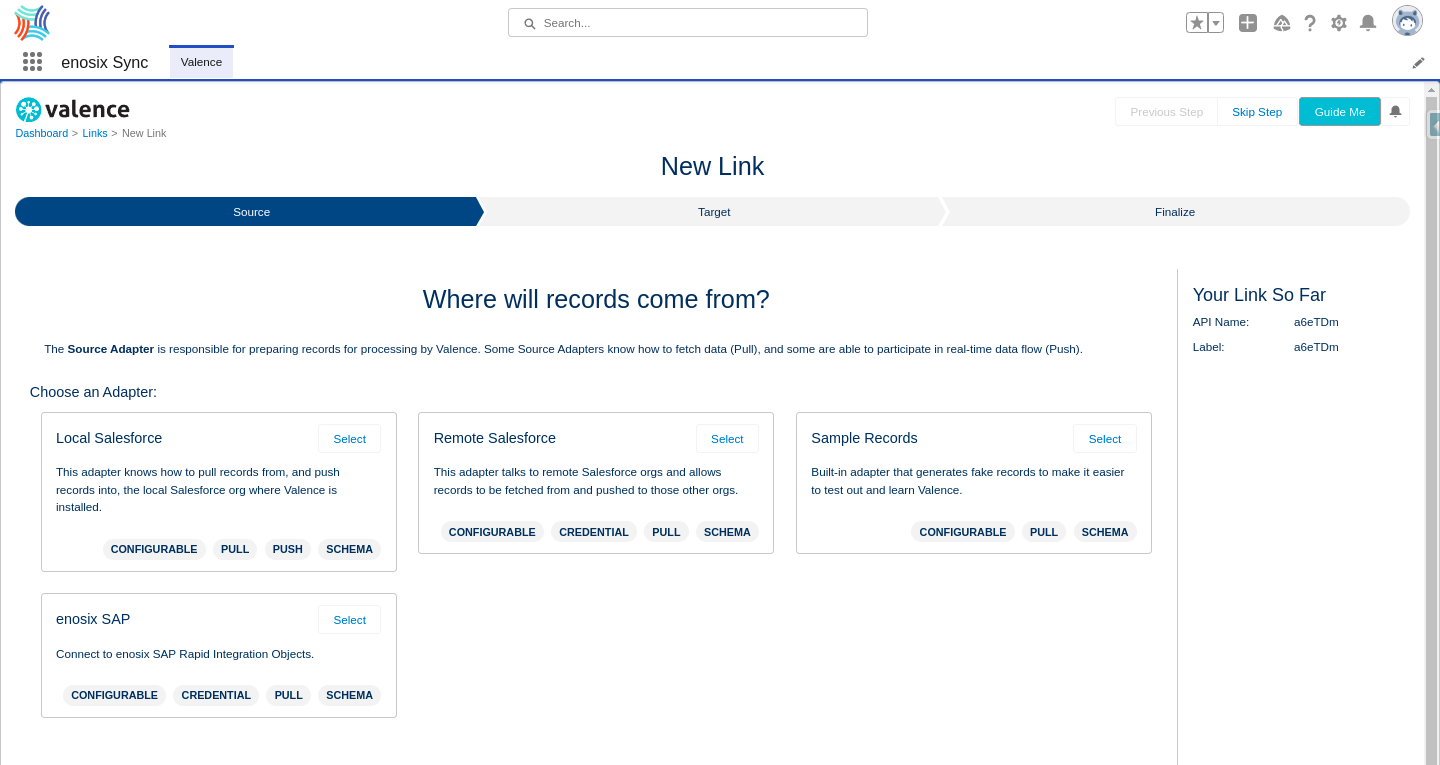
1. Choose to create a new link
2. Select the enosix SAP adapter
When you create a link you need to select the enosix SAP adapter which will allow you to configure necessary required information SAP needs when running the sync.
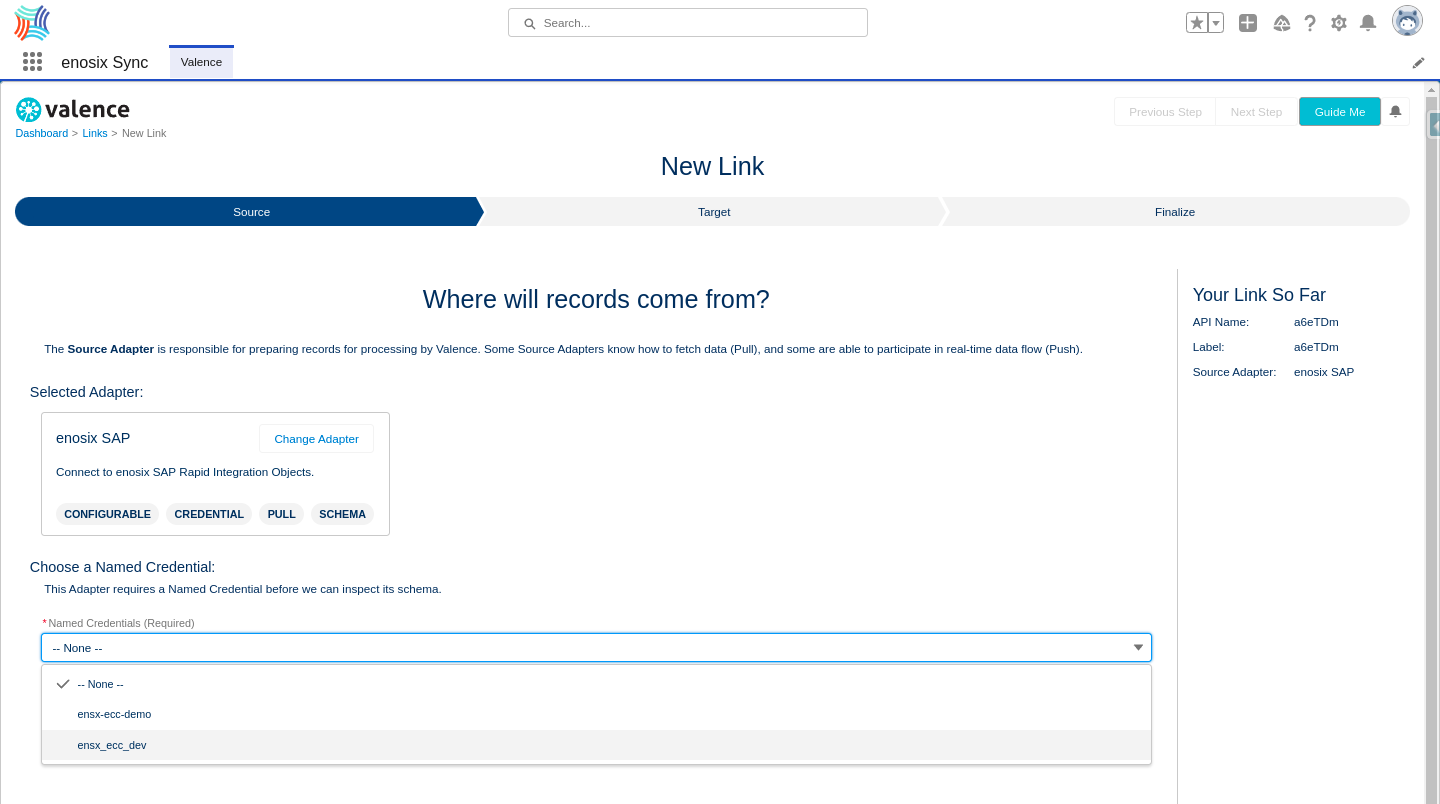
3. Choose a Named Credential
The named credential you have configured for your SAP system will allow the link to connect to your SAP system to get the list of RIOs to select from depending on the data you want to sync.
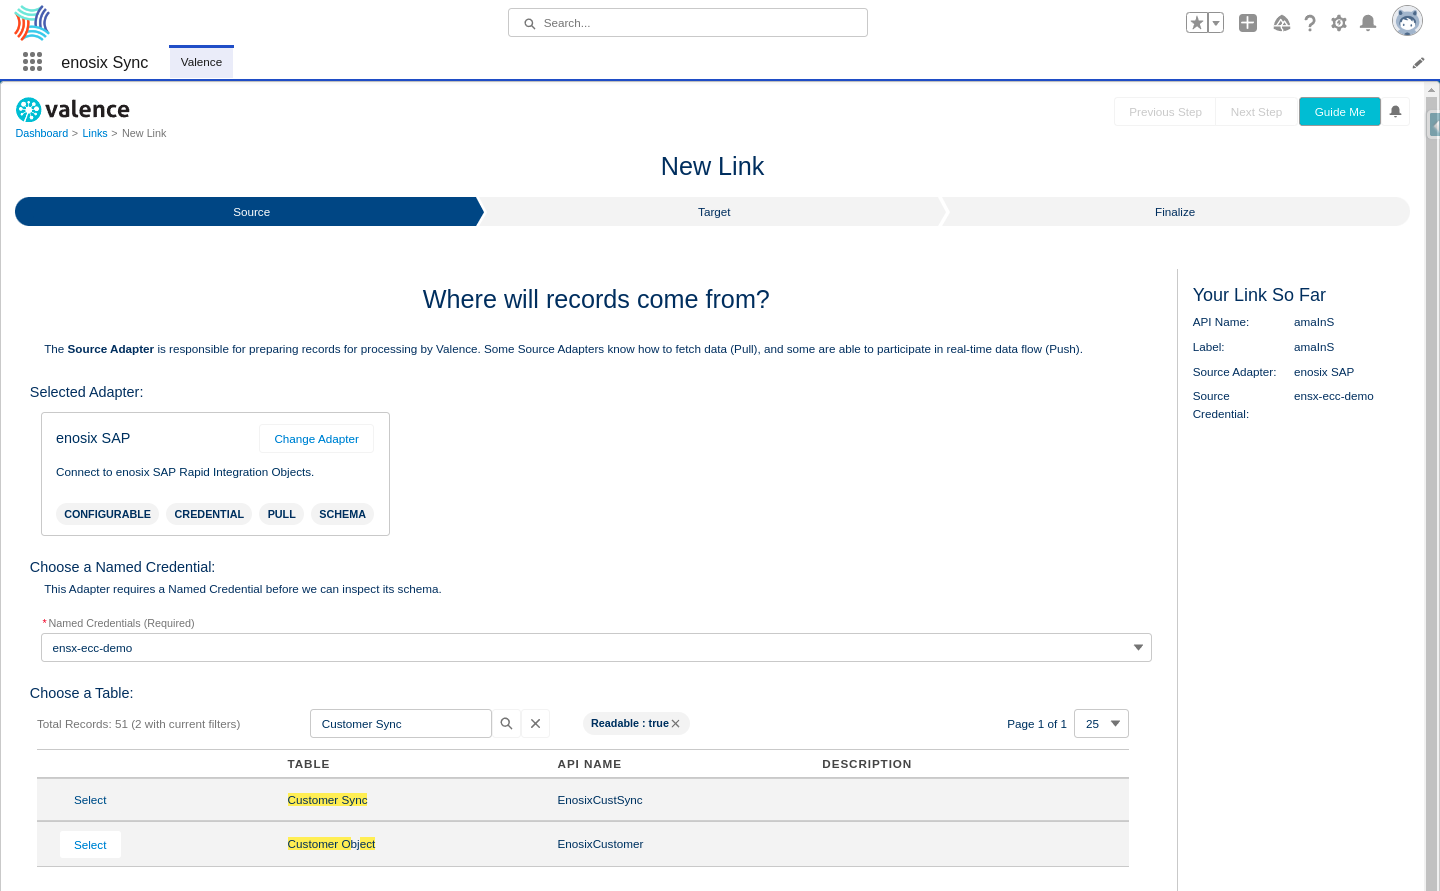
4. Choose Customer Sync
For this example we can select the Customer Sync RIO to get the list of SAP Customers into Salesforce. If you have a lot of RIOs you can use the search field to narrow the list.
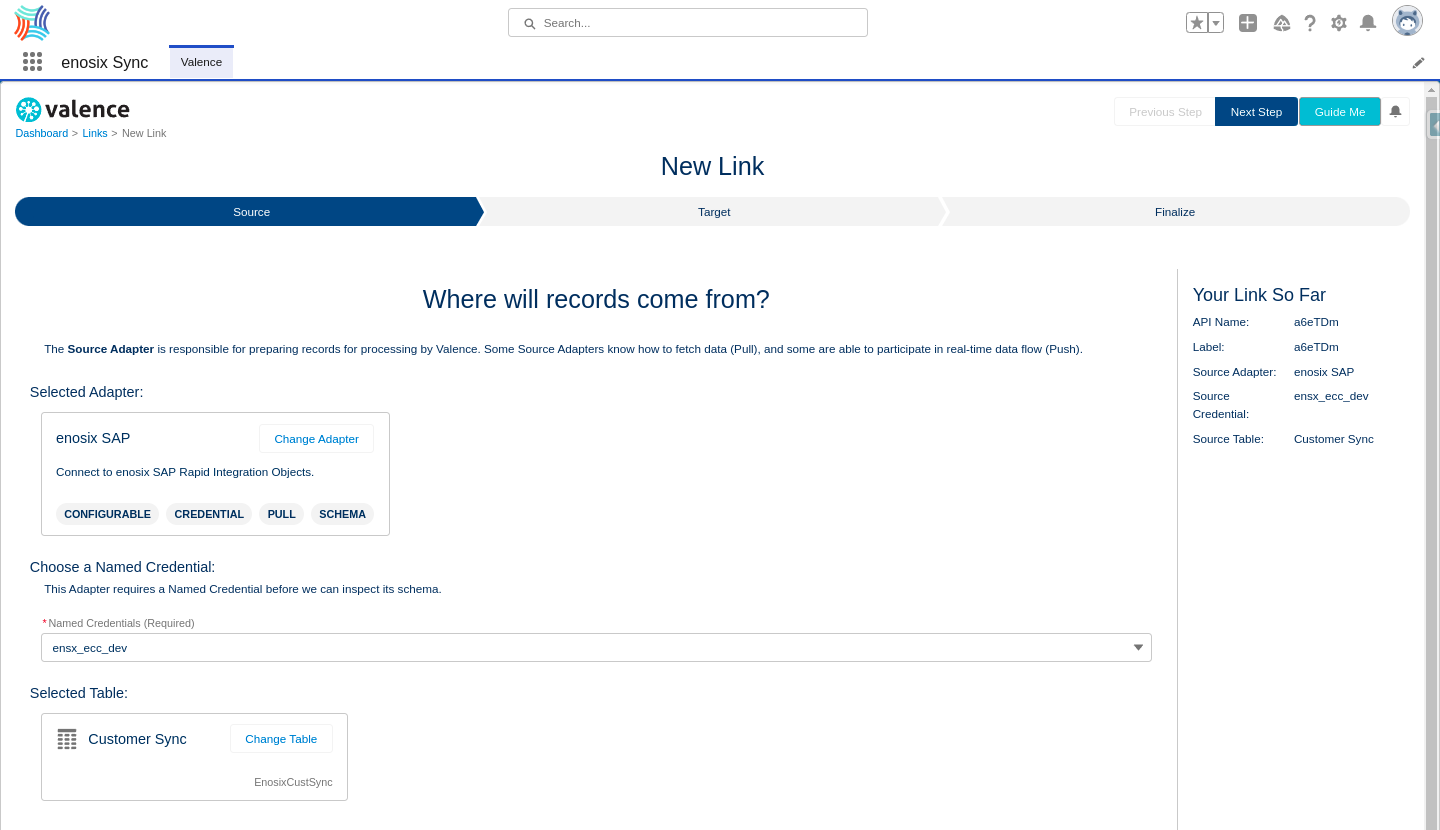
5. Click Next Step button.
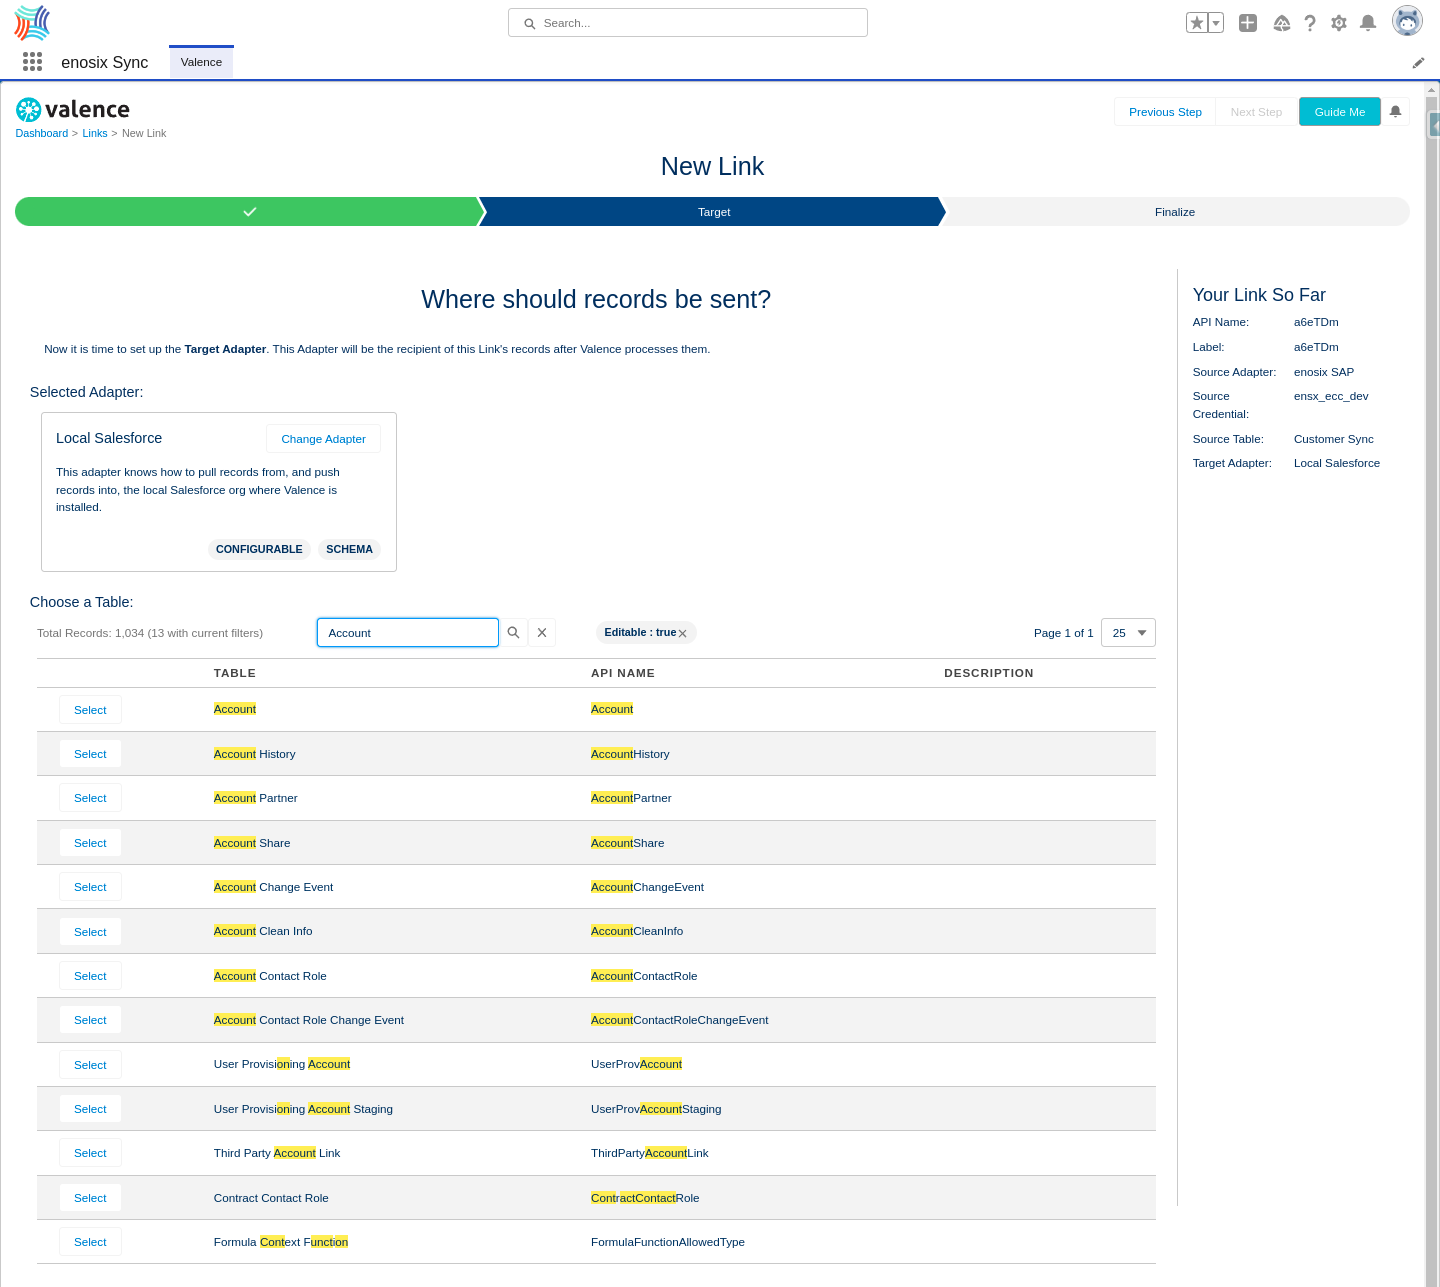
6. Select Local Salesforce
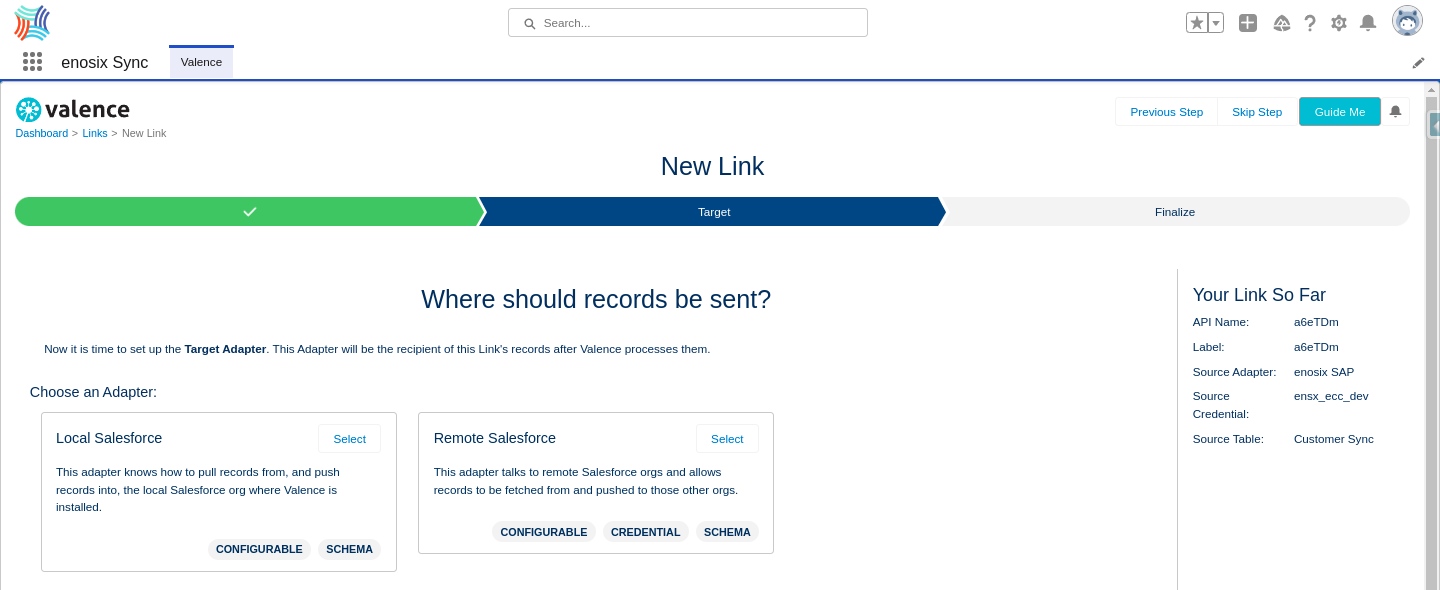
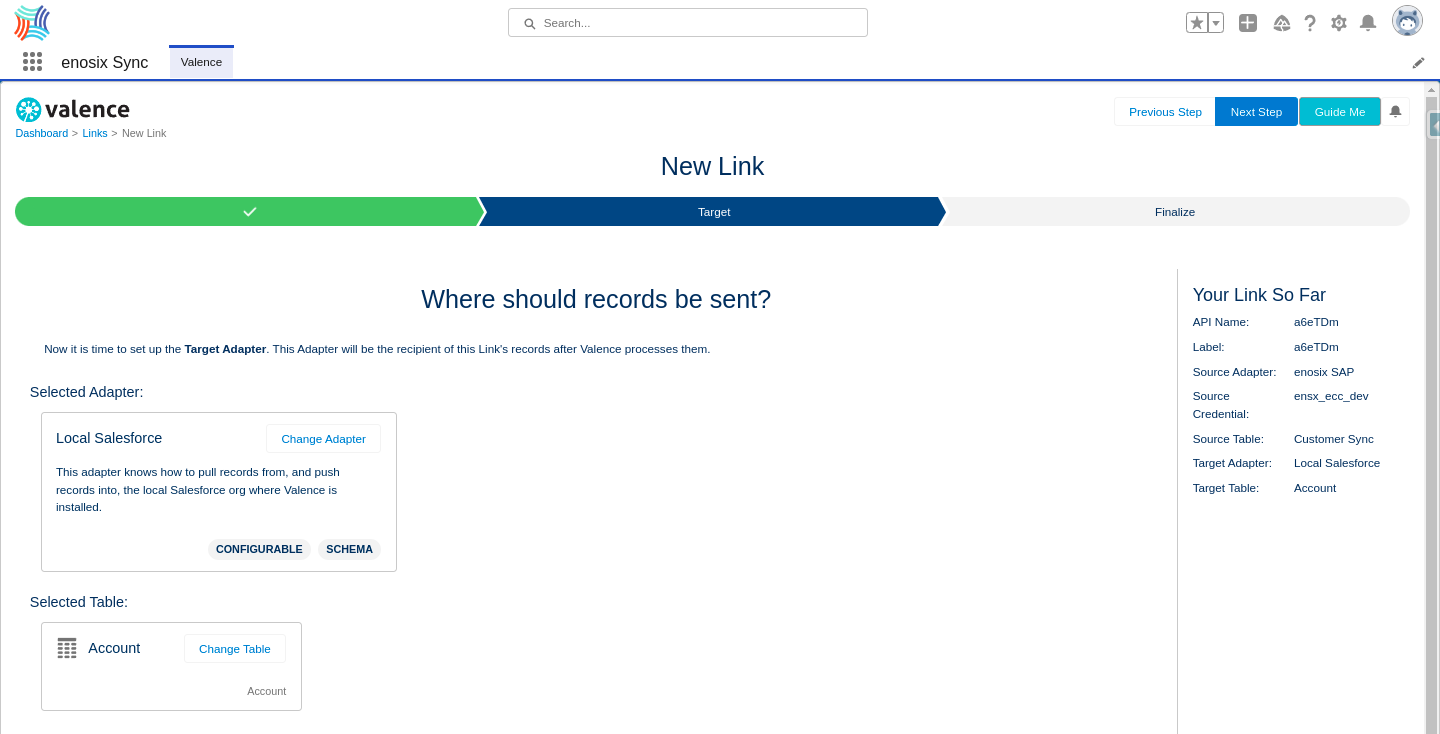
7. Select Account
Because we selected the Customer Sync RIO we want to create and update existing accounts in Salesforce with the Customers in your SAP system.
8. Click Next Step button.
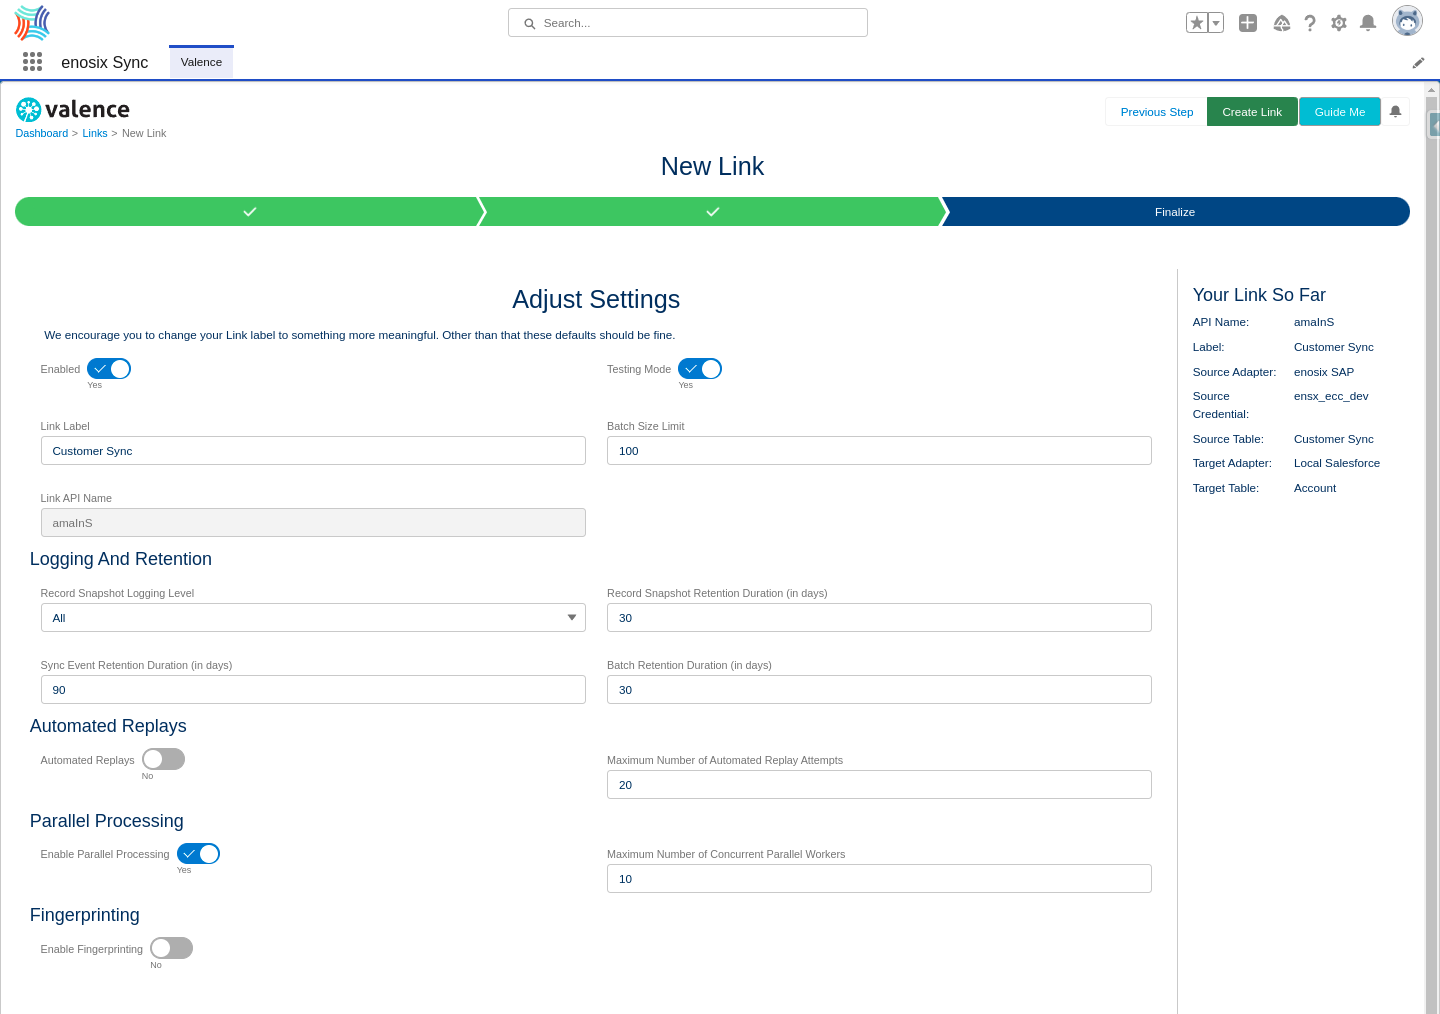
9. Set link details
Now we can set the details of the link for this example.
(For more information about configuration options go to Link Settings)
- Enter
Customer Syncas yourLink Label. - Set the
Batch Size Limitto100. - Toggle
Test ModetoOn.- This allows you to test the sync before actually populating the data in Salesforce
- Set
Record Snapshot Logging LeveltoAll- This allows you to see data from SAP that will be synced to Salesforce after you run the sync and view the details later in this guide.
- Click on the
Create Linkbutton.
10. Link Dashboard
You will now be on your newly created Customer Sync link's dashboard page.
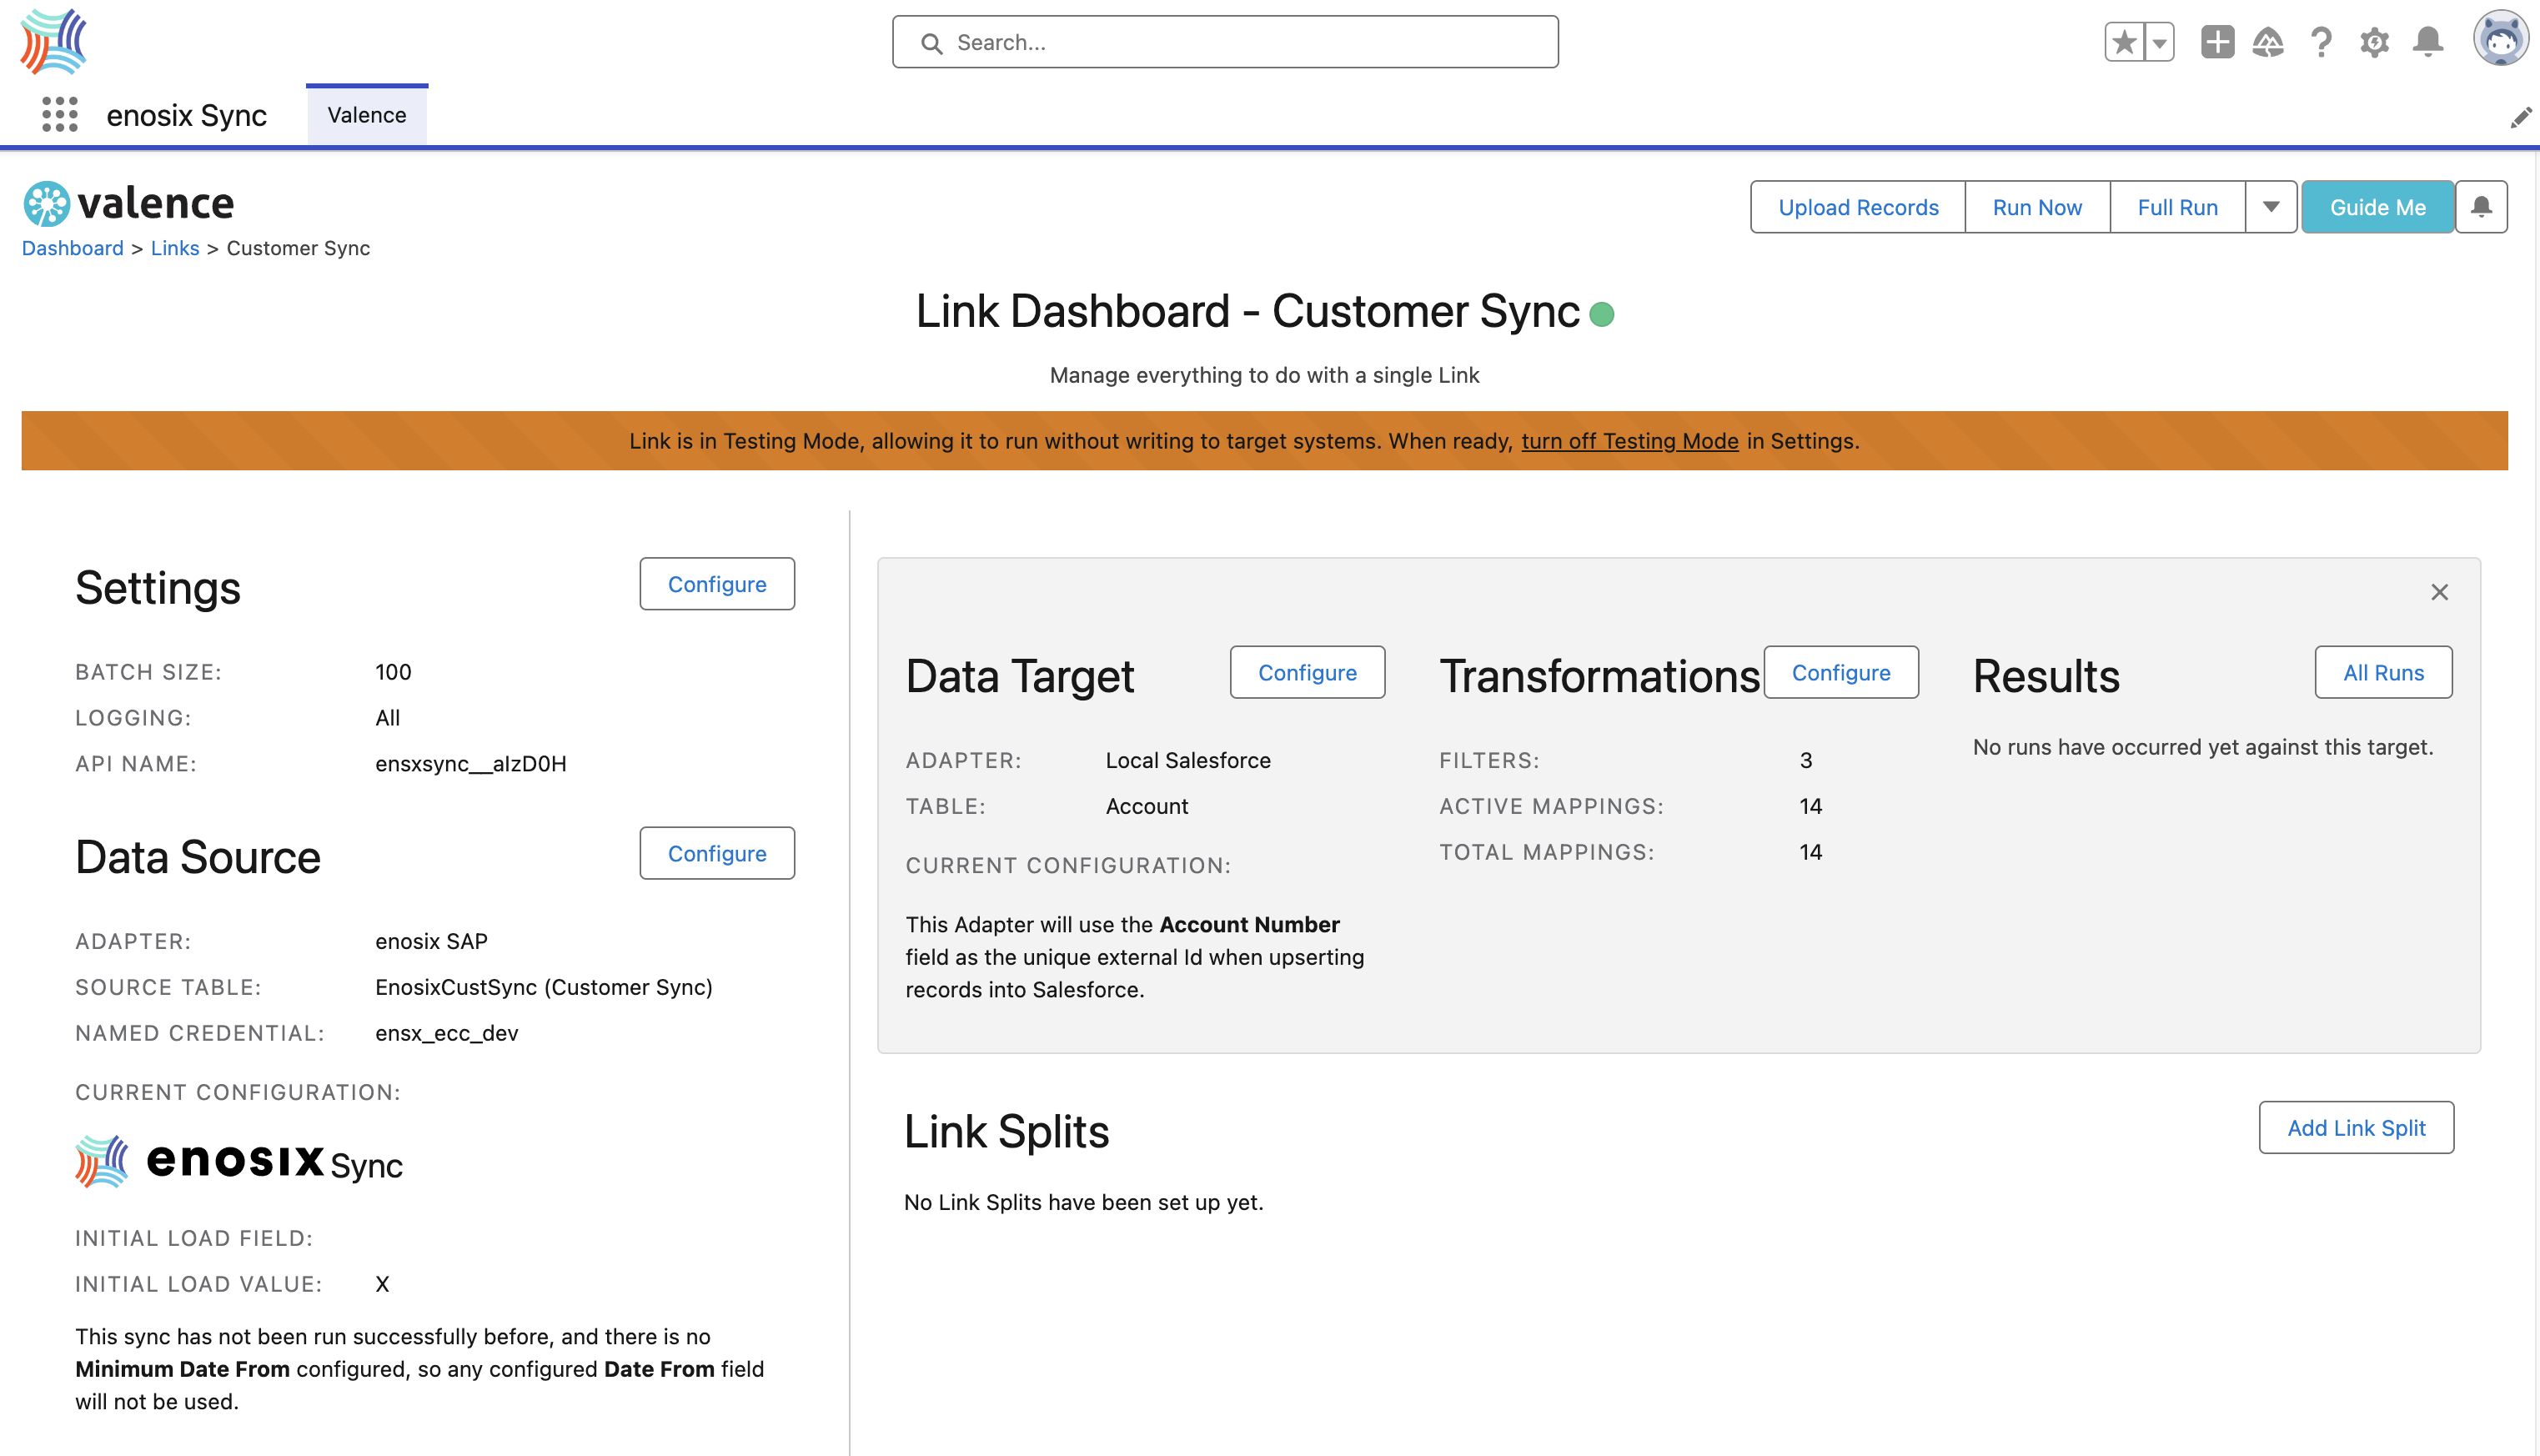
Next we will configure the rest of the Customer Sync link areas starting with the Data Source.