Checkly API monitoring
Overview
Checkly is low-cost, third-party API monitoring software. You can use Checkly to create a monitoring dashboard for your enosix Link connections and set up alerts that notify you when a specific condition occurs. Checkly lets you add as many alert channels (email, Slack, SMS, etc.) as you want.
You should be able to implement Checkly for about $7/month and you can try Checkly for free.
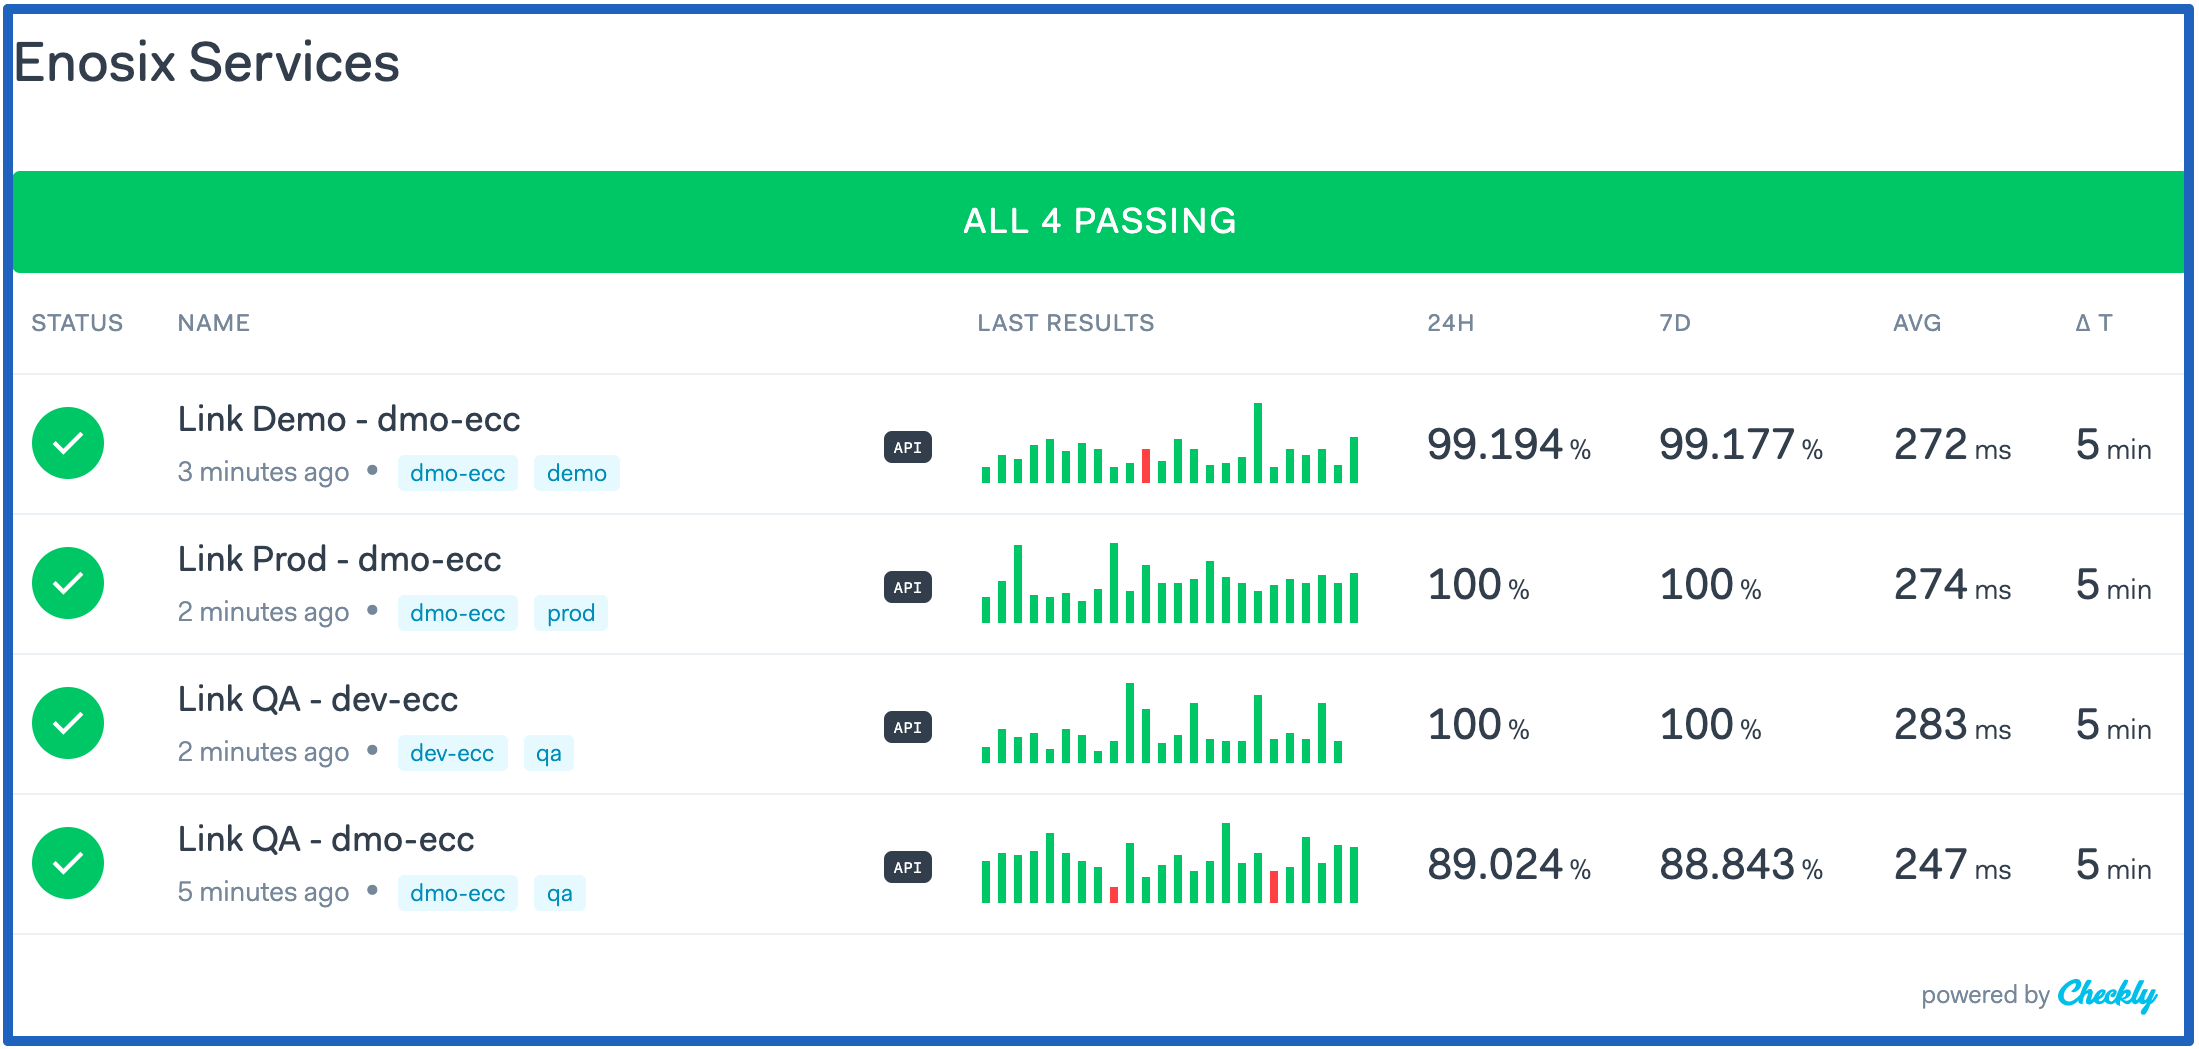
Your end result will look like this after you configure API checks for multiple enosix Link environments.
Register with Checkly
To configure API monitoring in Checkly, you first need to register with Checkly. If you’ve already registered with Checkly, you can proceed to the configuration steps listed below. Otherwise, you need to go to the Checkly website and register with Checkly.
Configure API Monitoring in Checkly
The following steps describe how to configure API monitoring with email and SMS alerts in Checkly:
- From your Checkly dashboard, click Create new and select API check from the drop-down list.

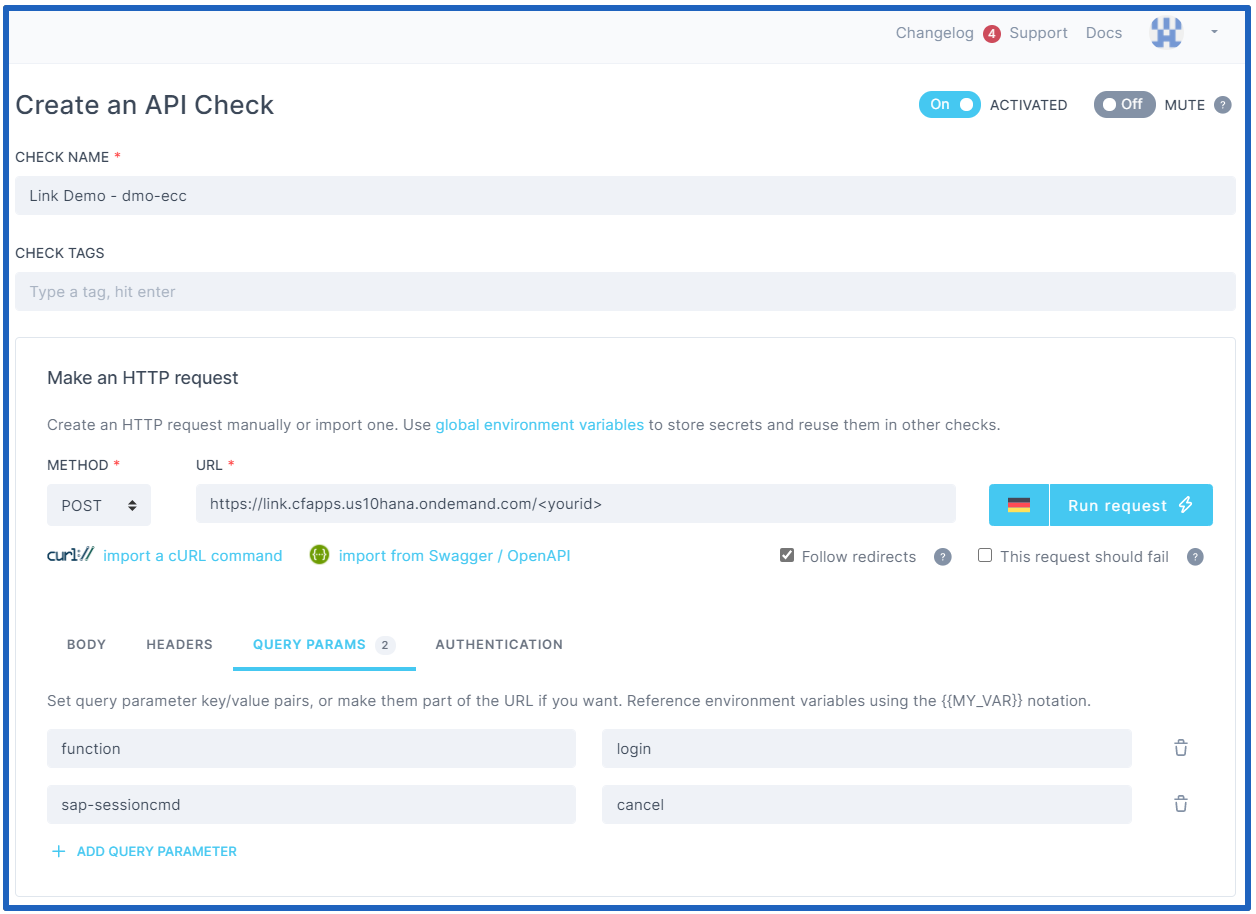
- The Create an API Check screen displays.

- On the Create an API Check screen, enter your desired API check name in the CHECK NAME text box. We suggest that you use a naming convention like “Link {Salesforce Environment} {SAP System}” (example: “Link Demo - dmo-ecc”).
- In the Make an HTTP request area, select POST from the METHOD drop-down list, then enter the appropriate link in the URL text box. The URL should be the full link route including the token (example: https://link.cfapps.us10hana.ondemand.com/{yourid}).
- In the Make an HTTP request area, click the QUERY PARAMS tab and enter a query parameter key/value pair in the Name and Value text boxes (example: enter “function” in the Name text box and enter “login” in the Value text box).
- In the Make an HTTP request area, click the AUTHENTICATION tab and enter your SAP service account information in the User name and Password fields.

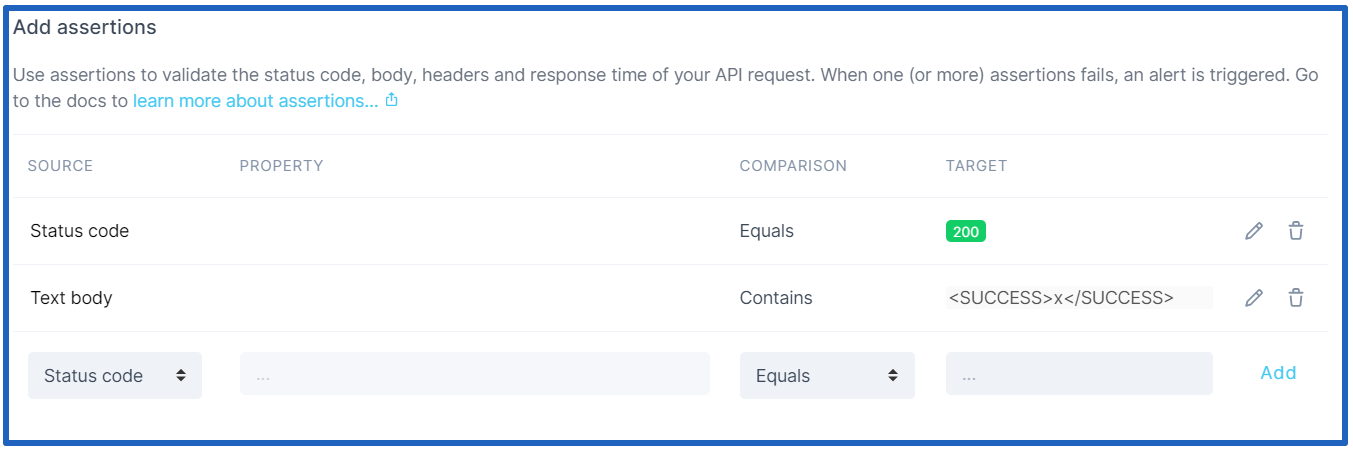
- In the Add assertions area, select Status code from the SOURCE drop-down list, select your desired COMPARISON from the drop-down listen, enter a TARGET value in the text box (example: 200), then click the Add button to create the assertion.
- In the Add assertions area, select Text body from the SOURCE drop-down list, select your desired COMPARISON from the drop-down listen (example: Contains), then enter a TARGET value in the text box (example: <SUCCESS>X</SUCCESS>).
- The Where should we alert you? area displays the email address and phone number where alerts will be sent.

You configured Checkly for API monitoring and it’s ready to use.