Tiered Pricing
enosix Commerce supports SAP tiered pricing (also known as pricing scales) which allows a business to set per-unit item prices based on the quantity of an item being purchased. This lets you provide pricing discounts to your customers when they purchase larger quantities of a specific product. In order to implement tiered pricing in enosix Commerce, you must have the Professional Package (or higher) installed.
enosix Commerce can be configured to calculate an item’s price in one of the following ways:
- You can price just the item being viewed on a standalone basis.
- You can consider all the items in the cart when determining the price for an item. This way, if there are any pricing interactions between items, the actual price for an item can take into account all of those interactions. This configuration requires more time to perform the pricing calculations, but it can be more accurate, depending on your pricing rules.
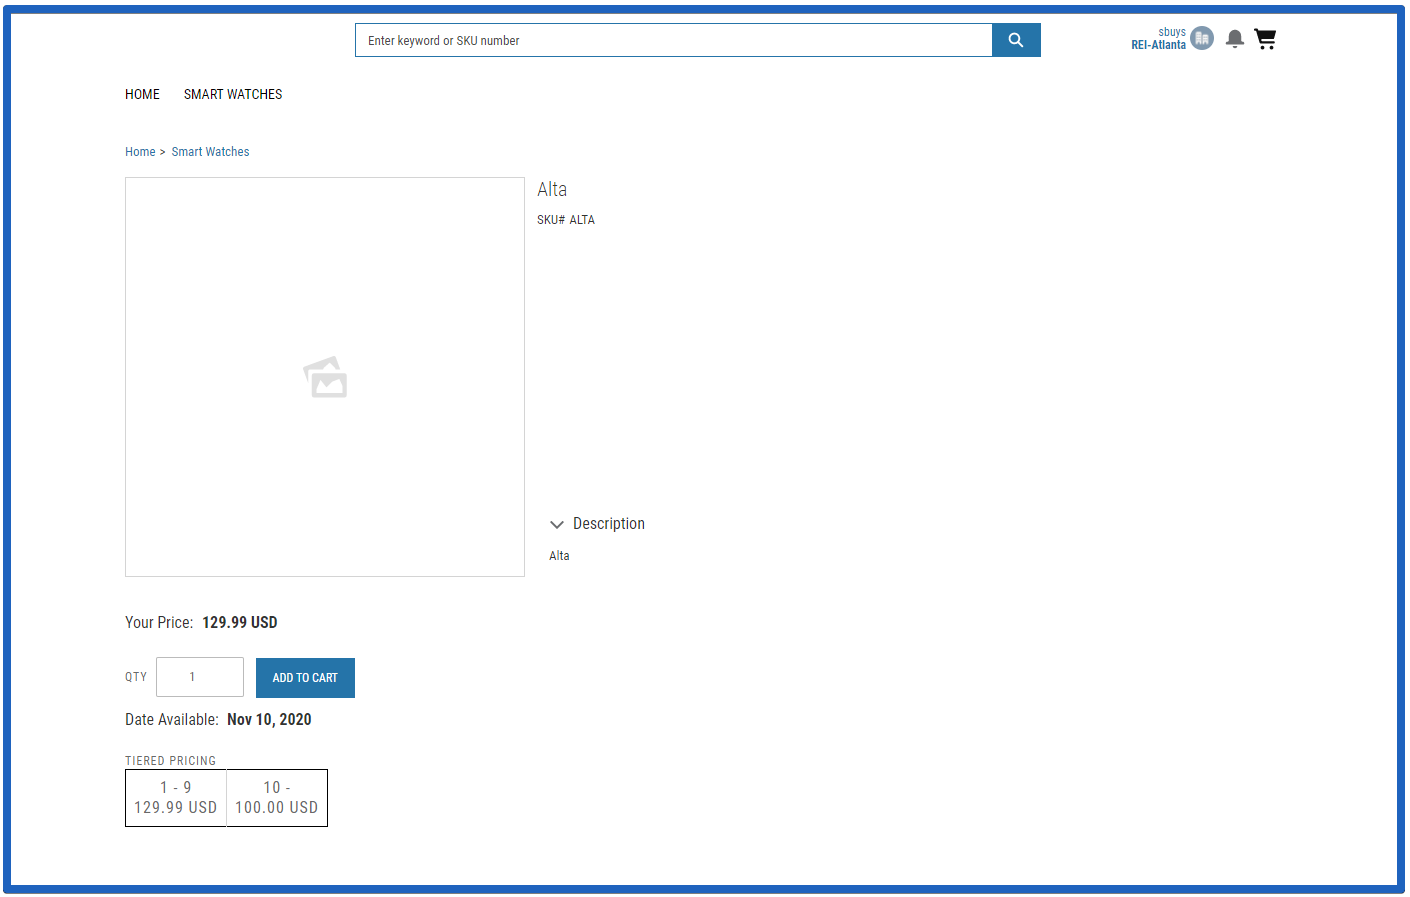
When you implement tiered pricing for a specific item, you specify per-unit item prices for two or more quantity ranges. For example, you can set tiered pricing rates as follows for a smart watch:
- 1-9 watches = $129.99/watch
- 10 or more watches = $100.00/watch
An item’s Product Detail page takes into account how many product units are already in a customer’s cart when the per-unit item price is calculated. This way, if a customer already has some product units in their shopping cart when they select more product units, the item’s per-unit price is calculated based on the total number of units (units already in the shopping cart plus selected units on the Product Detail page).
Using our tiered pricing smart watch example, if a customer has 5 watches in their shopping cart and selects 5 more watches, then the displayed price for the 10 smart watches will use the $100.00/watch price to calculate the total price.
Remove Salesforce Boxes and Buttons
When you add enosix Commerce pricing to a product page, you should remove the standard Salesforce boxes and buttons (Qty, Add to Cart, etc.) from the page. You do this by modifying the theme’s CSS. Follow these steps:
- Open Experience Builder.
- Click the Theme button from the Experience Builder menu (it looks like a paintbrush).
- Use the drop-down at the top right and select Edit CSS.
- Click Use Overrides to confirm your selection.
- Paste the following CSS content into the text box and click Save.
- Click Publish.